Debit vs Credit Abroad – Which Saves More?

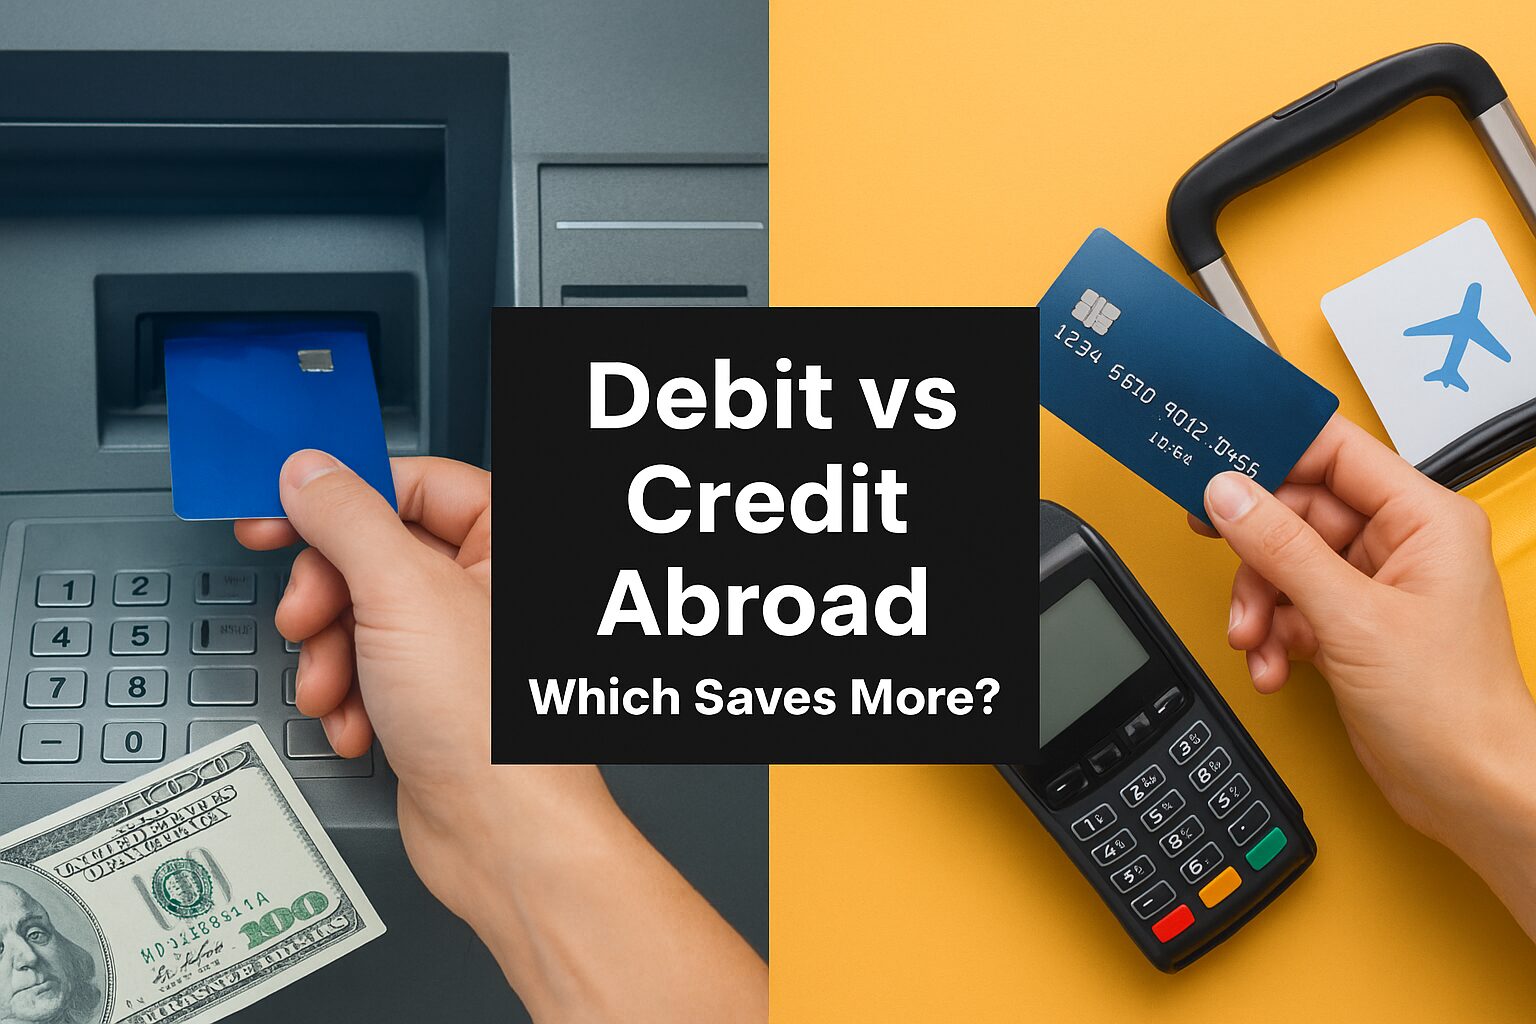
A split-screen image showing debit vs credit card usage abroad, highlighting travel savings and rewards

The Real-Life Dilemma

It’s a warm summer evening in Rome. You just finished a lovely dinner at a trattoria, and the bill comes to €100. You open your wallet. Inside, you have two options:

  • A debit card linked to your checking account.
  • A travel rewards credit card that promises points and protections.

Which one should you use?

Most people think the difference is minor—just swipe whichever card is closest. But in reality, this decision can change how much you pay, how safe your money is, and what benefits you receive. Over the course of a long trip, a semester abroad, or a year of online international shopping, the difference can add up to hundreds of dollars.

This article is your comprehensive guide to choosing between debit and credit cards abroad. We’ll cover everything: fees, exchange rates, protections, rewards, and real-world scenarios. By the end, you’ll know exactly when to use debit, when to use credit, and how to combine both for maximum savings.


2. Understanding the Basics

2.1 Debit Cards Abroad

  • How they work: Funds are pulled directly from your bank account at the time of purchase.
  • Advantages: Simple, familiar, accepted at ATMs.
  • Drawbacks: Higher ATM and foreign transaction fees, limited fraud protection, no rewards.

2.2 Credit Cards Abroad

  • How they work: You borrow money from the issuer, then pay it back later.
  • Advantages: Strong fraud protection, rewards, purchase insurance, and often better FX rates.
  • Drawbacks: Potentially high fees if you use them incorrectly (cash advances, interest if unpaid).

3. The True Costs of Using Your Card Abroad

When you swipe a card overseas, there are multiple costs hidden in the background:

3.1 Foreign Transaction Fees

  • Debit: Typically 1–3%.
  • Credit: Usually 3%, but many travel cards offer 0% FX fees.

3.2 ATM Withdrawal Fees

  • Debit: Your bank’s fee + the local ATM’s fee. Some banks reimburse (e.g., Charles Schwab).
  • Credit: Cash advances are expensive—often 5% upfront fee plus 20%+ interest.

3.3 Exchange Rate Markups

  • Debit: Banks often apply their retail rate, with hidden spreads.
  • Credit: Visa and Mastercard use wholesale interbank rates, which are usually more favorable.

4. Real-World Case Studies

Let’s compare debit vs credit in real spending scenarios.

Case 1: The €100 Dinner

  • Debit (3% fee): $103 charged.
  • Credit (0% FX fee card): $100.
    Winner: Credit

Case 2: ATM Withdrawal of €200

  • Debit: $200 + $5 ATM fee + 1% FX = $207.
  • Credit: $200 cash advance + $10 fee + interest = $215+.
    Winner: Debit

Case 3: Paying $1,000 Tuition Abroad

  • Debit: 2% fee = $1,020.
  • Credit: 0% fee + 2% cashback = effective $980.
    Winner: Credit

Case 4: Online Shopping – Amazon US ($250)

  • Debit: 3% FX = $257.50.
  • Credit: 0% FX + 1.5% cashback = effective $246.25.
    Winner: Credit

Case 5: Monthly Rent Payment (€800)

  • Debit: 2% fee = €816 equivalent.
  • Credit: May not be accepted for rent → debit is only option.
    Winner: Debit (by necessity)

5. Beyond Fees – What Else Matters?

5.1 Fraud Protection

  • Debit: Funds leave immediately. Disputes can take weeks.
  • Credit: Strong protection; fraudulent charges are disputed before you pay.

5.2 Rewards & Perks

  • Debit: Rarely offers perks.
  • Credit: Cashback, airline miles, hotel points, extended warranties, rental car insurance.

5.3 Budgeting & Control

  • Debit: Good for controlling overspending—limited to your account balance.
  • Credit: Can encourage overspending if not disciplined.

5.4 Credit History

  • Debit: No effect.
  • Credit: Builds credit score when used responsibly.

6. Traveler-Specific Strategies

For Vacationers

  • Use credit for hotels, flights, restaurants.
  • Use debit only for ATM cash withdrawals.

For International Students

  • Credit card for tuition, textbooks, and protection.
  • Debit card for groceries and daily small expenses.

For Online Shoppers

  • Always use credit cards with no FX fees.
  • Always pay in seller’s currency (avoid DCC).

7. The Hybrid Strategy – Combining Debit and Credit

The smartest approach is not to choose one over the other but to use both strategically.

  • Primary Card: Credit card with 0% FX fees for all purchases.
  • Secondary Card: Debit card with low ATM fees for cash withdrawals.

Examples of great combos:

  • Credit: Chase Sapphire Preferred, Capital One Venture, Amex Platinum.
  • Debit: Wise, Revolut, Charles Schwab (ATM fee reimbursements).

8. Extended Case Studies – Large vs Small Transactions

Large Purchases ($2,000 Flight)

  • Debit: 2% = $2,040.
  • Credit: 0% FX + 2% cashback = $1,960 effective.
    Credit saves $80.

Daily Small Transactions (€5 coffee every day for a month)

  • Debit: Minimal difference, ~€155 vs €150.
  • Credit: Potentially better rates but smaller relative savings.
    Both okay, but credit offers fraud protection.

9. FAQ

Q1: Can I avoid ATM fees abroad with a debit card?
Yes, some banks reimburse fees (e.g., Charles Schwab, Fidelity).

Q2: Is it ever okay to use a credit card for ATM withdrawals?
Only in emergencies. Fees and interest make it extremely costly.

Q3: Are prepaid travel cards better?
Sometimes, but they may have hidden reloading fees.

Q4: What if my bank blocks my card abroad?
Always notify your bank and carry at least two cards.

Q5: Which cards are safest for online shopping?
Credit cards are safer thanks to fraud protection and dispute rights.

Q6: Do student cards abroad have special benefits?
Some offer lower fees, but always check FX costs.

Q7: Should I carry multiple credit cards?
Yes. One Visa and one MasterCard ensure broader acceptance.

Q8: Is cash still necessary abroad?
Yes, especially in small shops or rural areas. Use debit for withdrawals.


10. Actionable Checklist

  • Carry both debit and credit cards.
  • Use credit for purchases, debit for cash withdrawals.
  • Always choose local currency at checkout (avoid DCC).
  • Pick cards with 0% FX fees.
  • Use fintech apps like Wise or Revolut for transparent rates.
  • Track spending in real-time to avoid surprises.

11. Conclusion – The Final Verdict

There is no single winner in the “debit vs credit abroad” debate. Instead, the smart move is to combine both:

  • Credit for purchases, protection, and rewards.
  • Debit for cash access with low-fee accounts.

With this hybrid approach, you’ll minimize fees, maximize safety, and even earn rewards while traveling, studying, or shopping abroad.
📌 Next Article Preview

“Avoid DCC (Dynamic Currency Conversion) – Always Pay in Local Currency”
Learn how merchants trick you into paying more by charging in your home currency—and how to avoid losing 3–5% every time you swipe.

The Complete Guide to Exchange-Rate Discounts – How to Maximize Bank Waivers and Pre-Exchange Strategies

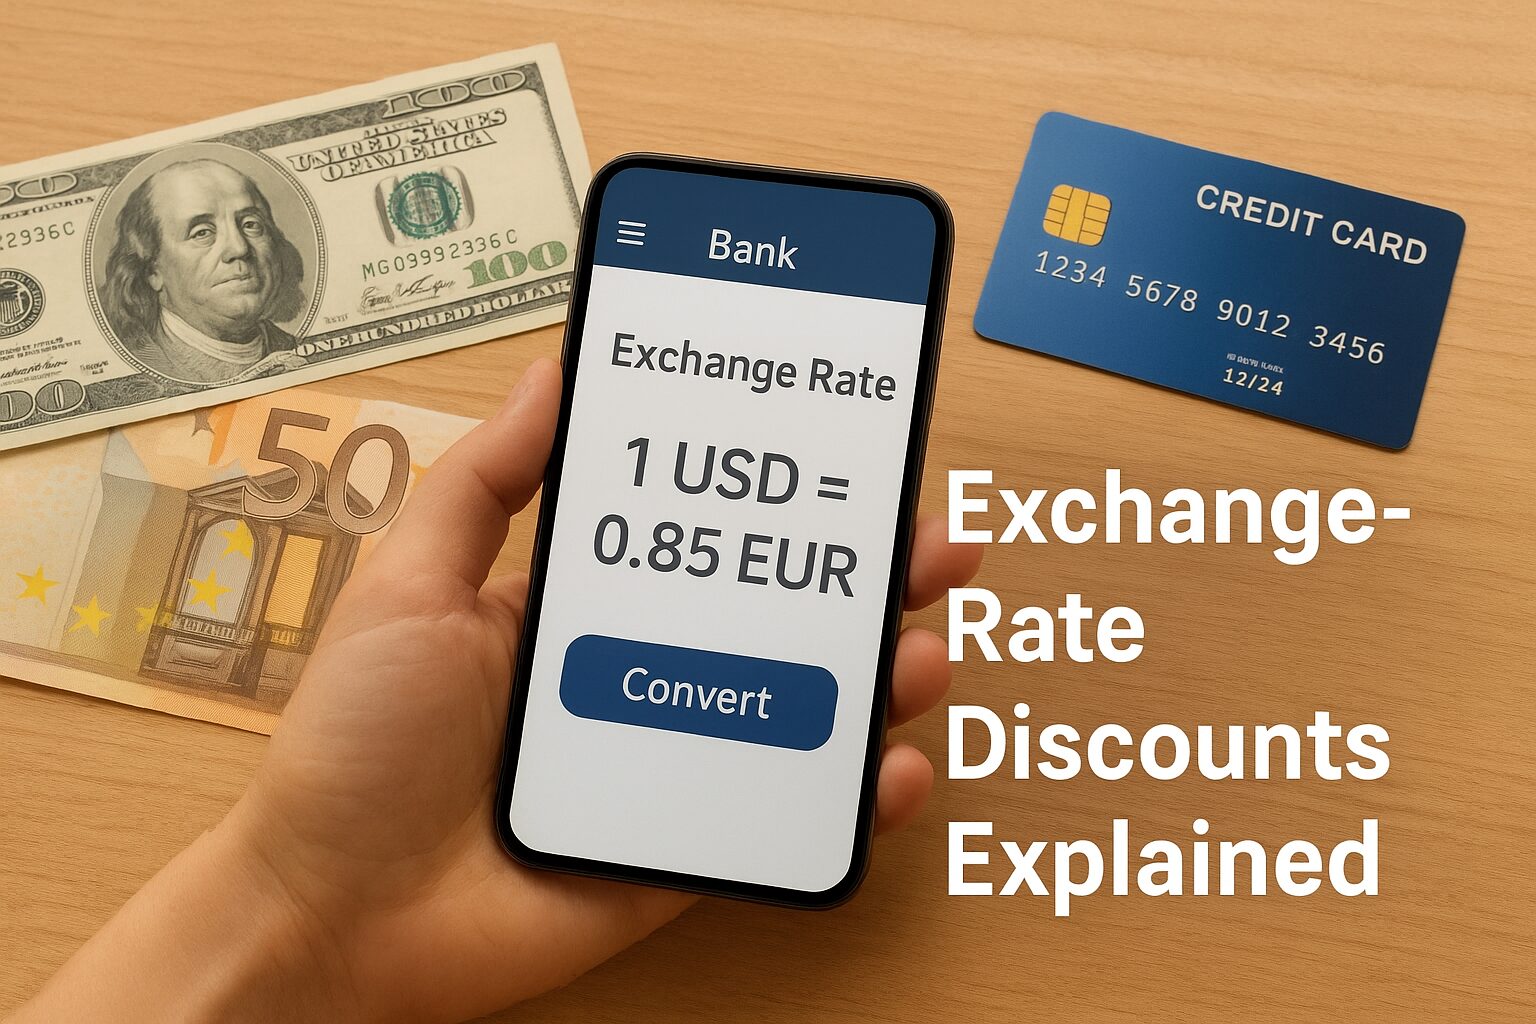
A traveler checking exchange rates on a mobile banking app with cash and a credit card on the table

The $1,000 Difference You Didn’t Notice

Picture this: you and your friend both buy $1,000 worth of plane tickets. You use your regular credit card, while your friend uses a card with a 50% exchange-rate discount from their bank. When the statements arrive, you paid $1,030, but your friend paid only $995.

That’s a $35 difference on just one purchase. Multiply that across hotel stays, tuition payments, or regular online shopping abroad, and suddenly you’re losing hundreds or even thousands each year.

The hidden secret? Exchange-rate discounts.

This guide will show you how banks apply them, when to use pre-exchange vs real-time conversion, and how to stack strategies so you never waste money again.


2. What Are Exchange-Rate Discounts?

Exchange-rate discounts are preferential currency conversion rates offered by banks, card issuers, or fintech apps. Instead of charging you the full spread (the gap between the interbank rate and the retail rate), they reduce or waive part of it.

For example:

  • Standard retail rate: $1 = ₩1,350
  • Interbank rate: $1 = ₩1,330
  • Discount: 50% → you get $1 = ₩1,340

It doesn’t sound like much, but if you convert $10,000 for tuition, that’s ₩100,000 saved.


3. When Do Banks Apply Discounts?

3.1 Online/Mobile Banking Events

Many banks offer seasonal promotions:

  • 30–90% off exchange spread if you convert via mobile app.
  • Higher discounts for VIP customers or larger amounts.

3.2 Card Transactions Abroad

Some credit cards automatically apply a preferential rate for purchases abroad, especially premium travel cards.

3.3 Coupons & Loyalty Programs

Frequent flyer programs, student accounts, or loyalty memberships may provide exchange-rate coupons (20–70% discount).


4. Pre-Exchange vs Real-Time Conversion

4.1 Pre-Exchange (Before You Travel)

  • You convert money in advance, usually at your home bank.
  • Advantages: lock in rates when favorable, often combined with discount coupons.
  • Best for: tuition payments, rent, or planned expenses.

4.2 Real-Time Conversion (At Point of Purchase)

  • Currency is converted at the time of transaction.
  • Advantages: flexibility, no need to pre-plan.
  • Risks: volatile rates, hidden spreads.

Rule of Thumb:

  • For large planned expenses, pre-exchange with discounts.
  • For small or daily spending, real-time with a no-fee fintech card (Wise, Revolut).

5. Case Study – The $1,000 Test

Scenario 1: Bank A with 50% Discount

  • Interbank rate: 1,330
  • Retail spread: 20
  • Effective rate with 50% discount: 1,340
  • Cost of $1,000 = ₩1,340,000

Scenario 2: Bank B with No Discount

  • Rate: 1,350
  • Cost = ₩1,350,000

Scenario 3: Fintech (Wise/Revolut)

  • Uses near-interbank rate: 1,332
  • Cost = ₩1,332,000

Difference between Bank B and Fintech: ₩18,000 on just $1,000.


6. How to Access These Discounts

6.1 Use Mobile Apps

  • Many banks hide their best discounts inside their apps.
  • Example: “Up to 90% off FX fees if you pre-exchange online.”

6.2 Timing Matters

  • Discounts often rise before travel seasons (summer, holidays).
  • Watch for student campaigns (August–September, January).

6.3 Fintech Cards

  • Wise, Revolut, N26 offer interbank rates with transparent fees.
  • Best choice for frequent travelers and online shoppers.

7. Pro Tips by Audience

For Travelers

  • Pre-exchange a base amount with discounts.
  • Use Wise or Revolut for day-to-day expenses abroad.

For Students Abroad

  • Pay tuition in larger chunks during discount events.
  • Split monthly rent into discounted pre-exchanges.

For Online Shoppers

  • Always compare PayPal conversion vs card billing.
  • Some banks offer exclusive FX discounts for online purchases.

8. FAQ

Q1: Is it always better to pre-exchange?
No. If your bank offers poor rates even with discounts, fintech apps may be cheaper.

Q2: Do debit cards also get exchange-rate discounts?
Yes, but less common. Credit and prepaid travel cards get better deals.

Q3: Can I combine exchange-rate discounts with credit card rewards?
Yes, and this is the smartest move—save on FX fees and earn miles/points.


9. Actionable Checklist

  • Always check your bank’s mobile app for discount events.
  • Pre-exchange large expenses when rates are favorable.
  • Use fintech cards (Wise, Revolut) for small, daily purchases.
  • Compare pre-exchange vs real-time before big trips.
  • Never let PayPal auto-convert—always bill in local currency.

10. Conclusion + Next Article Preview

Exchange-rate discounts are not just a “bonus.” They are a powerful tool to keep more money in your pocket. By combining bank waivers, pre-exchange strategies, and fintech solutions, you can save hundreds or even thousands every year.


📌 Next Article Preview:
In our next article, “Debit vs Credit Abroad: Which Saves More?”, we’ll break down the real costs of using debit and credit cards while traveling overseas. You’ll discover how fees, exchange rates, and hidden charges differ—and learn which option truly keeps more money in your pocket
.

How to Use Freelancing to Transition to an O-1 or E-2 Visa – Step-by-Step Blueprint

A scenic beachside workspace showing a laptop and passport on a wooden table, symbolizing digital nomad freedom and global mobility through online income.

Breaking into the U.S. as a freelancer with big goals? Whether you’re an artist, engineer, or digital nomad, freelancing can be the bridge to a long-term visa. This guide will show you how to use your freelance career as a launchpad to secure an O-1 or E-2 visa—legally, strategically, and confidently.


1. Understand the Purpose of Each Visa

  • O-1 Visa: For individuals with extraordinary ability in arts, sciences, education, business, or athletics.
  • E-2 Visa: For entrepreneurs and investors from treaty countries investing in a U.S. business.

If you freelance with the intent to prove expertise (O-1) or build a business (E-2), this path may be right for you.


2. Start Building a Freelance Portfolio That Matters

Not all freelance work helps your visa case. Choose projects that:

  • Have international or U.S.-based clients
  • Include media mentions or awards
  • Show high earnings and business growth
  • Involve prestigious collaborations

📌 Example: A graphic designer with 10+ published magazine covers and international clients has stronger proof for an O-1.


3. Set Up a U.S.-Compliant Business Structure

For E-2 applicants:

  • Set up an LLC or C-Corp in a U.S. state (Delaware or Wyoming are popular)
  • Open a U.S. business bank account
  • Invest a substantial amount in the business (usually $50K+)
  • Prepare a business plan, invoices, and income statements

For O-1 applicants:

  • Your freelance business should operate like a personal brand
  • Your work must be well-documented and public-facing

4. Document Everything from Day One

Start a digital folder with:

  • Contracts and invoices
  • Bank statements
  • Client testimonials
  • Awards or mentions
  • Media coverage (screenshots or PDFs)

📌 These documents become crucial for proving your qualifications later.


5. Work with a Visa-Savvy Immigration Attorney

You can begin alone, but visa transition gets technical fast. A qualified attorney can:

  • Structure your freelance work properly
  • Help position your business or achievements for visa approval
  • Prevent costly mistakes (like violating immigration rules)

6. Avoid Freelancing While on Ineligible Visas

Do not freelance in the U.S. while on:

  • B1/B2 tourist visas
  • ESTA visa waiver
  • F-1 (unless authorized via CPT/OPT)

Unauthorized work can lead to bans or visa rejection.


7. Track Your Success Metrics

Officers care about real impact. Keep track of:

  • Income earned
  • Media appearances
  • Testimonials and reach
  • Notable clients or collaborations

Make your story quantifiable.


8. Show Future Intent with a Clear Vision

Your freelance story must align with long-term visa goals.

  • Want an O-1? Show extraordinary ability and future work in the U.S.
  • Want an E-2? Prove your business can grow and create jobs.

Include a business roadmap or 2-year forecast.


9. Real Examples of Freelance-to-Visa Success

  • A YouTube filmmaker with millions of views and brand deals → O-1 visa
  • A UX designer who launched a U.S. LLC and hired a local contractor → E-2 visa

Success is possible—but only with strategy and proof.


10. Final Tip: Stay Consistent and Patient

Visa-based freelancing is not overnight success. But with planning, documentation, and persistence—you’re building your immigration case every day.


📌 Coming Up Next
The Best Online Platforms for Immigrants to Start Earning Today
→ In the next post, we’ll reveal the top freelance platforms that are not only beginner-friendly—but also safe and accessible for immigrants seeking global opportunities and long-term income.

How to Book Last-Minute Flights Without Overpaying – Summer Travel Hacks That Actually Work

A digital photograph of a quiet airport terminal at sunset, showing multiple gate signs and a distant airplane, used to illustrate strategies for booking last-minute flights affordably.

Last-minute travel doesn’t have to mean last-minute regret.
Whether you’ve got a spontaneous business trip, a sudden family visit, or you’re just chasing a spontaneous summer escape—you don’t have to pay outrageous prices.

In fact, with the right tools and tactics, booking cheap flights at the last minute is completely possible.

This guide breaks down real, proven strategies for finding affordable last-minute flights that actually work—no gimmicks, no outdated tips. Let’s get started.


1. Use Flight Aggregators That Prioritize Speed & Flexibility

When time is tight, search engines that specialize in real-time pricing are your best friend.

Best Platforms:

  • Skyscanner – great for date flexibility
  • Google Flights – powerful filters + quick refresh
  • Hopper – predictive price tracking (even for last-minute deals)
  • Kiwi.com – great for unconventional routes and virtual interlining

Pro Tip: Use “Everywhere” or “Flexible dates” options to uncover hidden cheaper routes or nearby airports.


2. Book One-Way Segments Instead of Round-Trips

Sometimes, booking a round-trip limits your options.
Split your journey into two one-way flights on different airlines and you might:

  • Find better times
  • Save 20–40%
  • Use alternate airports more flexibly

Use platforms like Kayak Mix, Kiwi, or manual booking to test this.


3. Know the Cheapest Time of Day to Book

While there’s no perfect hour, patterns show:

  • Tuesday or Wednesday afternoons (local time) often reveal cheaper fares
  • Avoid booking Friday–Sunday evenings: airlines know you’re desperate

Also, book flights that depart midweek (Tue/Wed/Thu) to avoid weekend surcharges.


4. Be Airport-Smart – Use Secondary Airports

Many major cities have lesser-known secondary airports with lower fees and less demand.

Examples:

  • Paris → Try Orly (ORY) instead of CDG
  • London → Try Gatwick or Stansted instead of Heathrow
  • NYC → Try Newark or even Philadelphia if you’re flexible

Use Google Flights’ nearby airport filter to compare total travel times.


5. Set Mobile Alerts & Go Incognito

Stay ahead of price jumps:

  • Set price alerts via Hopper or Skyscanner
  • Use incognito mode when checking prices repeatedly (to avoid dynamic pricing hikes)
  • Sign up for flash deal newsletters (Scott’s Cheap Flights, Jack’s Flight Club)

Real-time alerts can make the difference between a $700 flight and a $300 deal.


6. Use Points or Miles If Available (Even Partial)

Last-minute is when travel points shine the most.
Even if you don’t have enough for a full ticket:

  • Some cards allow partial point + cash combos
  • Airline reward portals often release last-minute reward seats with lower fees
  • Consider cashing in points on baggage, upgrades, or lounge access if flight prices are fixed

7. Book at Off-Hours or Even on the Day Of

Yes, same-day tickets can be cheap—if:

  • You book them very early (midnight–6am)
  • You check for last-minute cancellations on airline apps
  • You’re flexible with layovers or routing

Airlines sometimes release standby seats or unsold premium class seats close to departure.


Real Example: Tuesday Night vs Saturday Morning

Same route: NYC to LA – 2 days before travel

Booking TimeFare (Economy)
Tuesday 11 PM$238
Saturday 9 AM$472

Same airline. Same day. Just different booking windows.


Final Thoughts: Last-Minute Doesn’t Mean Last-Resort

The myth that “last-minute = overpriced” isn’t always true.
With smart tools, flexible thinking, and a bit of boldness—you can travel cheaper, even on short notice.

It’s not just about saving money. It’s about saying yes to the moment, without draining your wallet.


📌 Coming Up Next

Best Travel Insurance Plans for Digital Nomads This Summer – Stay Safe Without Overpaying
→ Compare real coverage levels, hidden exclusions, and smart recommendations for global remote workers.

The Most Overrated vs Underrated Summer Destinations – Timeless Travel Wisdom for Smarter Trips

A minimalist travel scene showing a coastal mountain landscape with no people or buildings—just pure nature, soft blue water, and sunlit cliffs, evoking the contrast between overhyped and hidden travel gems.

Not all summer vacations are created equal.
Some destinations look amazing on Instagram but disappoint in real life. Others quietly offer unforgettable experiences—without the hype, crowds, or inflated prices.

In this guide, we compare the most overrated and most underrated summer destinations around the world. Our goal isn’t to shame popular places—but to help you make smarter travel decisions, based on value, experience, and authenticity.

Let’s dig in.


OVERRATED SUMMER DESTINATIONS

These places are popular for a reason—but that doesn’t mean they’re the best option for everyone.


1. Santorini, Greece

Why it’s overrated:

  • Extremely crowded during peak months
  • Overpriced hotels with average service
  • Instagram-famous spots often overrun by tourists

What to do instead:
→ Visit Naxos or Paros for a more authentic Greek island vibe without the chaos.
Naxos offers better value with a monthly cost around $2,100, faster Wi-Fi (35 Mbps), and fewer tourists compared to Santorini’s $3,200/month average and lower connectivity.


2. Bali, Indonesia (Canggu & Ubud areas)

Why it’s overrated:

  • Overdevelopment and traffic congestion
  • Rising costs due to overtourism
  • Beaches near Canggu are often polluted

What to do instead:
→ Try Lombok or the Mentawai Islands for unspoiled beaches and local culture.
Lombok features safer neighborhoods, faster Wi-Fi, and significantly less crowding—making it a rising star among mindful travelers.


3. Venice, Italy

Why it’s overrated:

  • Cruise ship crowds dominate the narrow alleys
  • High prices for food and lodging
  • Touristy atmosphere with fewer locals

What to do instead:
→ Head to Trieste or Bologna for richer cultural immersion and local charm.
Trieste combines Adriatic beauty with local life, faster connectivity (40 Mbps), and lower costs than Venice.


4. Dubai, UAE (in summer)

Why it’s overrated:

  • Temperatures often exceed 45°C (113°F)
  • Outdoor activities are limited
  • Most tourists end up staying indoors in malls

What to do instead:
→ Consider Georgia (Tbilisi) or Albania’s Riviera—they’re affordable and culturally rich.
Tbilisi, for example, has Wi-Fi speeds over 45 Mbps, a high safety score (89/100), and costs less than $1,200/month—ideal for digital nomads.


UNDERRATED SUMMER DESTINATIONS

These places don’t make every headline—but that’s exactly why they’re worth your attention.


1. Georgia (Country – not the US state)

Why it’s underrated:

  • Stunning Caucasus mountain scenery
  • Vibrant capital city (Tbilisi) with great cafes and history
  • Extremely affordable for long-term stays
  • Ranks high in safety (89/100), digital infrastructure, and value

2. Colombia’s Coffee Region (Salento, Manizales)

Why it’s underrated:

  • Lush green valleys and hiking trails
  • Unique rural culture and farm-to-table food
  • Less crowded than Cartagena or Medellín
  • Growing appeal for nature-loving remote workers

3. Albanian Riviera

Why it’s underrated:

  • Crystal-clear Adriatic beaches without the crowds of Greece or Italy
  • Inexpensive seafood and beachfront lodging
  • Friendly locals and increasing travel infrastructure
  • One of Europe’s best beach values with fewer influencers

4. Slovenia

Why it’s underrated:

  • Lakes, forests, and Alpine charm
  • Compact and easy to explore by train or car
  • Offers both natural beauty and cultural cities (Ljubljana, Bled)
  • Wi-Fi averages 50 Mbps and local transportation is top-tier

5. Naxos, Greece

Why it’s underrated:

  • Often overshadowed by Santorini and Mykonos
  • More spacious beaches, local tavernas, and relaxed pace
  • Cheaper accommodation and faster Wi-Fi than most Greek hotspots
  • Quietly becoming a favorite for those in-the-know

How to Choose: Overrated or Underrated?

Ask yourself:

  • Do I want photos—or peace?
  • Do I follow trends—or trust value?
  • Do I want to feel like a guest—or a traveler?

Sometimes, less famous means more memorable. Choose with intention, not just Instagram influence.


Final Travel Wisdom

The best summer destinations aren’t always the ones with the most hashtags.
They’re the places that leave you feeling refreshed, enriched, and inspired.
This summer, skip the hype—and travel wiser.


📌 Coming Up Next

How to Book Last-Minute Flights Without Overpaying – Summer Travel Hacks That Actually Work
→ Discover real-time tools, booking tricks, and the best days to fly for less—even at the last minute.

Top Co-Working Spots in Summer Getaways Around the World – Work Remotely Without Sacrificing Vacation

A peaceful wooden table beside a large window overlooking a tropical beach, with sunlight pouring in and a ceramic coffee mug resting in the corner—capturing the perfect summer remote work vibe with no visible laptop or people.

If you’re a digital nomad or remote worker, you’ve likely faced the challenge of balancing productivity and paradise. You want to explore dreamy destinations—but you can’t afford to drop your work commitments. The good news? You don’t have to choose between the two.

This guide reveals the top co-working spaces in summer hotspots around the world—where blazing Wi-Fi meets breathtaking views. Whether you’re looking for a beachfront desk in Bali or a mountain escape in Colombia, this list will help you work remotely without sacrificing your vacation.


1. Bali, Indonesia – Tropical Tranquility + Digital Community

Co-Working Highlight: Dojo Bali in Canggu

  • Steps from the beach
  • 24/7 access
  • Daily events and skill shares
  • Strong digital nomad network

Why it works in summer:
Bali is warm year-round, but June–August is drier, cooler, and perfect for sunset breaks after client calls.

Bonus Tip: Rent a scooter for quick access to cafes and yoga studios between tasks.


2. Lisbon, Portugal – Sun, Surf & Startups

Co-Working Highlight: Second Home Lisboa

  • Jungle-like interiors
  • Central location
  • Creative and tech-oriented crowd
  • Fast fiber internet

Why it works in summer:
Long sunny days, festivals, and great surfing spots just outside the city. Plus, Lisbon offers Europe’s best cost-to-quality-of-life ratio for digital nomads.

Bonus Tip: Enjoy lunch breaks at Time Out Market—just a short walk away.


3. Medellín, Colombia – Spring Weather Year-Round

Co-Working Highlight: Selina Medellín

  • Co-work and co-living options
  • Strong nomad presence
  • Close to nature

Why it works in summer:
Medellín is in the Southern Hemisphere, but its high altitude gives it eternal spring vibes—ideal for working without overheating.

Bonus Tip: Join a Spanish immersion group after work to connect deeper with locals.


4. Split, Croatia – Adriatic Charm with Remote Work Vibes

Co-Working Highlight: Saltwater Workspace

  • Historic old town location
  • AC-equipped workstations
  • Coastal views from your desk

Why it works in summer:
Croatia shines in summer with clear seas, island-hopping, and lively nightlife. You can wrap up work by 3 PM and catch a sunset ferry.

Bonus Tip: Book an Airbnb with a balcony to double as a workspace.


5. Chiang Mai, Thailand – Budget-Friendly Oasis

Co-Working Highlight: Punspace

  • Popular with long-term nomads
  • In the heart of the old city
  • Multiple branches
  • High-speed Wi-Fi & air-conditioning

Why it works in summer:
July is the start of rainy season—but it’s cooler, quieter, and a great time to focus indoors.

Bonus Tip: Join local meetups or productivity clubs to stay motivated during the rainy afternoons.


How to Choose the Right Co-Working Spot

When selecting a co-working space in a summer destination, consider:

  • Climate: Will it be too hot or rainy to enjoy?
  • Wi-Fi Reliability: Essential for video calls and uploads.
  • Access to Nature or Beach: So you can recharge between work sprints.
  • Community: Look for places with active events or Telegram/Slack groups.
  • Cost: Balance between luxury and practicality.

Tools to Find Your Next Summer Work Spot

Here are a few platforms to scout co-working-friendly destinations:


Pack Light, Work Smart

Don’t forget to bring:

  • Noise-canceling headphones
  • Portable laptop stand
  • Universal power adapter
  • Power bank
  • Light travel clothes (linens, synthetics)
  • VPN for secure remote access

If your co-working spot is this inspiring, you’ll be more productive and happier on the road.


📌 Coming Up Next

Most Profitable Freelance Niches for Summer 2025 – Digital Nomad Edition
→ Find out which online jobs thrive in summer hotspots and how to turn your travel into serious income.

What to Pack for a One-Month Summer Trip – Digital Nomad Edition

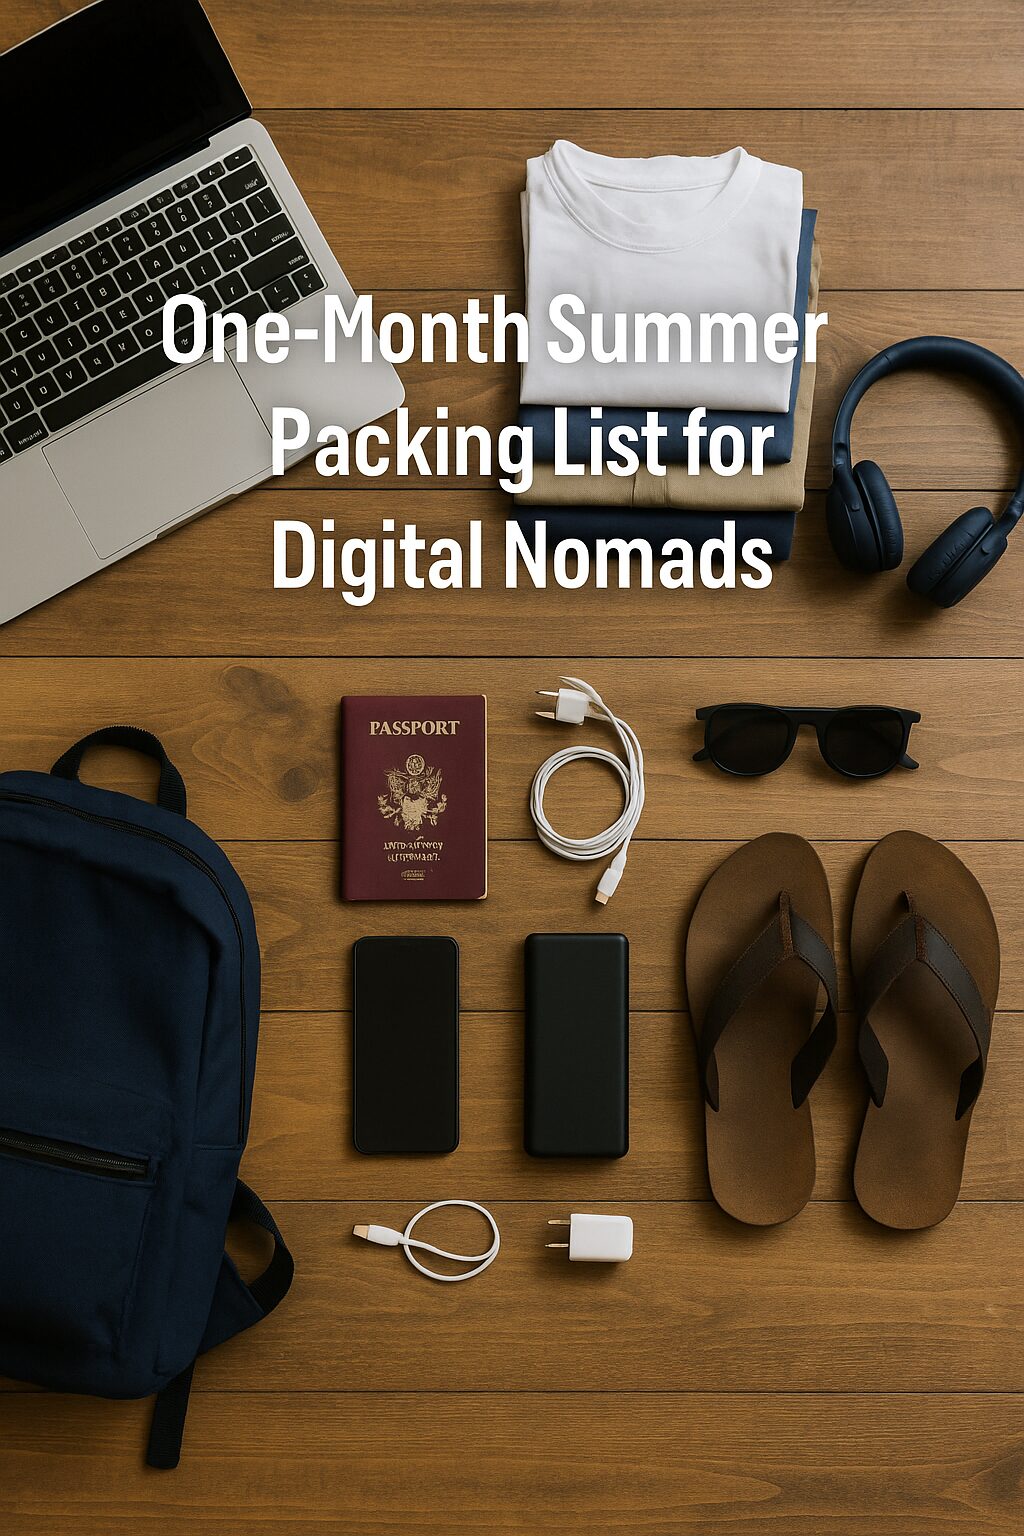
A neatly packed backpack with a laptop, summer clothes, and travel gear lying beside a tropical beach background — representing essential items for a one-month summer trip as a digital nomad.

Smart Packing for Freedom Seekers

Minimalism Meets Real Life

Packing for a one-month trip as a digital nomad isn’t about taking less—it’s about taking right.
Every item should serve a purpose.
The ideal pack is light enough to carry but complete enough to support your remote work, health, safety, and freedom.

Whether you’re headed to Lisbon, Chiang Mai, or Medellín, this is your one-stop packing guide to prepare for sun, uncertainty, and productivity abroad.


1. Digital Gear Essentials

Your gear is your income.
Here’s what you need:

  • Laptop + Charger: Reliable, lightweight, fast. Your mobile office.
  • Universal Power Adapter: For those “uh-oh” plug moments.
  • Power Bank (10,000mAh+): Keeps your phone going on long layovers.
  • Noise-Canceling Earbuds or Headphones: Essential for focus in busy cafés.
  • USB-C Multi-Port Hub: One hub to rule them all.
  • Backup Storage (SSD or Cloud Access): Don’t risk losing client work.
  • Laptop Stand + Wireless Mouse: Ergonomics matter, even on the road.

Bonus: Screen privacy filter for working in public.


2. Clothing Strategy: Layer, Rotate, Wash

Forget “one outfit per day.”
Think layered combos you can rotate and wash.

  • 7–9 Tops: T-shirts, tanks, and 1–2 nice shirts
  • 3–4 Bottoms: Shorts, quick-dry pants, travel-friendly jeans
  • 1 Light Jacket + 1 Packable Raincoat
  • 2 Swimwear Sets
  • 1 Scarf or Large Shawl
  • 3 Pairs of Shoes: Walking shoes, sandals, night-out shoes
  • Underwear/Socks: Enough for 1 week (wash mid-week)

Tip: Merino wool and synthetic fabrics dry faster and stay fresher longer.


3. Health & Hygiene Must-Haves

The last thing you want is to be sick or feel gross abroad.

  • Mini First Aid Kit
  • Prescription Meds + Copy of Script
  • Toiletries: Travel bottles or solid bars preferred
  • Sunscreen, Bug Spray, AfterBite Gel
  • Compact Towel + Face Cloth
  • Hand Sanitizer + Wet Wipes

Bonus: Travel bidet bottle or pack of toilet paper sheets for emergencies.


4. Admin, Workflow, and Identity

Work doesn’t stop just because you’re in paradise.

  • Notebook + Pen: Especially for offline moments
  • VPN App: For secure access to accounts
  • Password Manager: LastPass, 1Password, etc.
  • Offline Docs (PDF): Insurance, passport, visa letters
  • Printouts + Passport Photos
  • SIM Card Ejector + Portable Wi-Fi (optional)

5. Security and Finance

Fraud, theft, and accidents happen. Be ready.

  • Money Belt or RFID Pouch
  • Backup Bank Card in separate bag
  • Virtual Bank App (Wise, Revolut, etc.)
  • Travel Insurance Info (Printed + Digital)
  • Local Emergency Numbers saved to phone
  • Spare Cash in Local + USD (some ATMs reject cards)

6. Optional but Incredibly Useful

These aren’t must-haves, but they’ll seriously improve your experience.

  • Carabiner Hook: Hang anything from anywhere
  • Packing Cubes: Compress and organize
  • Collapsible Water Bottle
  • Laundry Detergent Sheets
  • Reusable Shopping Bag
  • Shoe Bag
  • Foldable Daypack: Light and convenient

7. Regional Customization Tips

Europe

  • Pack for unexpected weather swings (heat → storm)
  • Trains over buses = less time in transit
  • City shoes matter: cobblestones kill cheap sandals

Southeast Asia

  • Heat + humidity = extra underwear and sweat-absorbent clothing
  • Anti-mosquito wipes > spray (better for flights)
  • Sim cards are cheap and widely available

South America

  • Pack for altitude shifts (think: Bogotá vs Lima)
  • Keep essentials on your body during bus rides
  • Bring photocopies of your passport everywhere

8. Smart Packing Mistakes to Avoid

  1. Packing for “what if” scenarios
    → If it’s not 80% likely, leave it.
  2. Overpacking toiletries
    → Most cities have what you need
  3. Bringing only one pair of shoes
    → Rookie mistake: shoes get wet, break, or stink
  4. Skipping a first aid kit
    → Advil costs triple in airports
  5. Ignoring tech protection
    → Always bring a laptop sleeve + waterproof cover

Final Packing List Snapshot (Downloadable)

CategoryItems to Pack
TechLaptop, chargers, backup drive, headphones, adapter
Clothing7–9 tops, 3–4 bottoms, swimwear, 3 shoes
HealthFirst aid kit, sunscreen, meds, towel
AdminPassport copy, insurance, VPN, docs
SecurityRFID pouch, backup card, travel wallet
OptionalPacking cubes, water bottle, detergent, daypack

Final Thoughts: Light Pack, Free Mind

The more you carry, the less freedom you feel.

Don’t pack for comfort—pack for capability.
You can live lightly without feeling unprepared.
What you leave behind, you can almost always find locally.

This is your chance to test how little you actually need to live and work well.


📌 Next Up:
Looking for a place where you can work, connect, and relax this summer?
In our next post, we’ll reveal the Top Co-Working Spots in Summer Getaways Around the World—perfect for digital nomads who want fast Wi-Fi with a view.

Best Travel Insurance Plans for Digital Nomads This Summer

A modern traveler’s backpack resting on a beachside chair with a view of the sea, symbolizing peace of mind through travel insurance

A Practical Guide to Choosing the Right Coverage While Living Abroad

Why Travel Insurance Is No Longer Optional

For digital nomads, travel insurance used to feel like a “maybe.”
Not anymore.

Flight cancellations, lost laptops, sudden illnesses abroad—these are real risks when your life is 100% mobile.

In this post, we break down the top travel insurance options specifically designed for digital nomads, long-term travelers, and remote workers.
We’ll focus on what truly matters:
✔️ Coverage for remote work gear
✔️ Emergency healthcare abroad
✔️ Visa compliance
✔️ COVID or endemic illness support
✔️ Country-hopping flexibility


1. SafetyWing – Affordable and Nomad-Friendly

Best For: First-time nomads, remote workers on a budget

Overview:
SafetyWing is built by nomads, for nomads.
It works in 180+ countries, renews automatically every 28 days, and covers most essentials.

Pros:

  • Starts at ~$45/month
  • Covers COVID, emergency medical, evacuation, and even political unrest
  • Includes limited coverage in your home country
  • Works even if you’re already abroad

Cons:

  • No coverage for trip cancellation
  • Gear protection (like laptops) requires add-ons

Key Features:

  • Can be bought after departure
  • Renew month-to-month
  • Good for visa applications (proof of coverage available)

2. World Nomads – Adventure-Ready and Flexible

Best For: Travelers who engage in sports or multi-country trips

Overview:
World Nomads is well known in the backpacker and explorer community.
It’s pricier but covers a wide range of sports and gear.

Pros:

  • Strong medical coverage
  • Covers over 150+ adventure activities
  • Generous limits for personal belongings and theft
  • Multi-destination coverage

Cons:

  • Pricier: ~$100+/month depending on location
  • May require proof of residency for purchase

Key Features:

  • Claims can be filed online
  • 24/7 global assistance
  • Good for those traveling with camera equipment or instruments

3. Genki – Simple, Transparent Global Coverage

Best For: Europeans and digital nomads looking for ease and clarity

Overview:
Genki is an emerging favorite among EU-based nomads.
It offers one flat price for all countries and a clear policy structure.

Pros:

  • Transparent pricing (e.g., €69/month)
  • Accepts most nationalities
  • Long-term options (up to 2 years)
  • Direct billing available in some countries

Cons:

  • Does not cover trip interruption or cancellations
  • No U.S. home country coverage

Key Features:

  • App-based claim management
  • No hidden clauses
  • Especially helpful for EU citizens working abroad

4. Insured Nomads – Tech-Focused with Mental Health Coverage

Best For: Remote workers who want premium features

Overview:
Insured Nomads blends traditional insurance with digital tools like global telemedicine and mental health support.

Pros:

  • Includes therapy and mental health sessions
  • Telemedicine and 24/7 support through their app
  • Works for both short and long-term stays
  • Visa support letter available

Cons:

  • Premium pricing: $90–$150/month
  • Coverage limits vary by plan

Key Features:

  • Cybersecurity and crisis response tools
  • Can cover families traveling together
  • Cryptocurrency payment supported

5. IMG Global – Classic Provider with Custom Plans

Best For: Families, older nomads, and complex itineraries

Overview:
IMG offers high-limit, U.S.-style plans with many customization options.
It’s ideal if you want serious medical coverage.

Pros:

  • Extensive hospital network
  • Custom deductible and max benefit options
  • Family and senior-friendly plans

Cons:

  • Application process can feel bureaucratic
  • Some plans not available in all countries

Key Features:

  • Excellent for long stays in one country
  • Suitable for those with pre-existing conditions
  • May help meet residency requirements in visa applications

How to Choose the Right Insurance as a Digital Nomad

Key Questions to Ask:

  • Will you be working remotely or taking adventure trips?
  • Do you need tech gear coverage (laptop, camera)?
  • Will you stay in one country or move frequently?
  • Do you want mental health, therapy, or virtual doctor access?
  • Are you required to show proof of insurance for a visa?

Comparison Snapshot:

ProviderBest ForStarting PriceKey Feature
SafetyWingBudget nomads~$45/monthCountry-hopping + simple renewal
World NomadsAdventurous travelers~$100/monthCovers extreme sports & theft
GenkiEU-based nomads€69/monthTransparent & no residency required
Insured NomadsTech-savvy workers~$120/monthMental health + telemedicine
IMG GlobalFamilies & seniorsVariesStrong U.S.-style medical network

Pro Tips for Filing Claims Smoothly

  • Keep scanned copies of receipts, medical records, and incident reports
  • Use your provider’s mobile app to report claims instantly
  • Always report thefts or accidents to local authorities
  • For gear loss, take photos and get documentation from hotels or airlines

Final Thoughts: Insurance That Matches Your Life

Don’t just buy “travel insurance.”
Buy coverage that aligns with how you live.

If you’re working remotely, moving often, and carrying expensive gear, your needs are different from a tourist.

Investing in the right plan is cheaper than one emergency without coverage.

Peace of mind is not optional—it’s part of working smarter.


📌 Next Up:
Packing for a long trip this summer?
Our next post will give you the ultimate digital nomad packing list—everything you need for a one-month journey without overpacking or forgetting the essentials.


디지털 노마드를 위한 최고의 여행자 보험 – 여름 추천 플랜 총정리

해외 장기 체류자를 위한 실전 보험 선택 가이드

이제 여행자 보험은 선택이 아닙니다

예전에는 “여행자 보험”이 옵션처럼 느껴졌습니다.
하지만 이제는 아닙니다.

비행 취소, 노트북 도난, 해외에서 갑자기 아픈 상황 등은
모두 디지털 노마드에게 실제 일어나는 위험입니다.

이 글에서는 디지털 노마드, 장기 여행자, 원격근무자를 위해 설계된
실전 보험 플랜을 비교 분석합니다.

핵심 포인트:

  • 원격근무 장비 보호
  • 해외 응급 의료 지원
  • 비자 제출용 보험 증명
  • 전염병/코로나 보장 여부
  • 국가 간 자유로운 이동 허용 여부

1. SafetyWing – 저렴하고 노마드 친화적

추천 대상: 여행 보험이 처음인 노마드, 예산이 제한된 원격근무자

개요:
SafetyWing은 노마드가 만든 노마드를 위한 보험입니다.
180개국 이상에서 적용되며, 28일 단위로 자동 갱신됩니다.

장점:

  • 월 $45 수준으로 저렴
  • 코로나, 응급 의료, 정치적 불안 등 광범위한 보장
  • 자국 체류 중 일부 보장 가능
  • 이미 해외에 있어도 가입 가능

단점:

  • 여행 취소는 보장 안 됨
  • 노트북 등 장비 보장은 별도 옵션 필요

주요 특징:

  • 출국 후에도 가입 가능
  • 월단위 유연한 갱신
  • 비자 제출용 증명서 발급 가능

2. World Nomads – 모험가와 다국가 여행자용

추천 대상: 액티비티 중심 여행자, 다국가 일정이 많은 디지털 노마드

개요:
World Nomads는 백패커와 모험 여행자 사이에서 유명한 보험사입니다.
가격은 다소 높지만 다양한 활동과 장비를 보장합니다.

장점:

  • 강력한 의료 보장
  • 150개 이상의 액티비티 포함 (스쿠버, 등산 등)
  • 고가 장비 도난 보장
  • 여러 국가 여행 시 유리

단점:

  • 월 $100 이상으로 가격대가 있음
  • 일부 국가는 가입 시 거주 증명 요구

주요 특징:

  • 온라인 청구 가능
  • 24시간 글로벌 지원
  • 고가 장비(카메라 등)를 들고 다니는 여행자에게 유리

3. Genki – 심플하고 투명한 유럽 중심 보험

추천 대상: 유럽 국적의 노마드, 복잡한 구조가 싫은 사용자

개요:
Genki는 최근 유럽 디지털 노마드 사이에서 인기 있는 보험입니다.
국가 상관 없이 한 가지 요금, 명확한 조건이 장점입니다.

장점:

  • 고정 요금제 (€69/월)
  • 대부분 국적 수용 가능
  • 최대 2년까지 장기 체류 옵션
  • 일부 국가에서는 병원 직접 청구 가능

단점:

  • 여행 취소/중단 보장은 없음
  • 자국 내 보장은 불포함

주요 특징:

  • 앱 기반 간편 청구
  • 숨겨진 조항 없이 투명한 계약
  • 유럽 기반 노마드에 최적화

4. Insured Nomads – 정신건강까지 보장하는 테크 중심 보험

추천 대상: 정신건강·원격의료 기능이 필요한 프리미엄 사용자

개요:
Insured Nomads는 보험과 디지털 도구의 결합이 강점입니다.
원격 정신과 상담, 위기 대응, 텔레메디슨 기능을 제공합니다.

장점:

  • 정신건강 상담, 심리 치료 포함
  • 앱으로 24시간 원격의료 이용 가능
  • 단기~장기 체류 모두 가능
  • 비자 제출용 서류 제공

단점:

  • 월 $90~150 수준으로 가격대가 높음
  • 보장 한도는 플랜별로 다름

주요 특징:

  • 사이버 보안, 위기 대응 도구 포함
  • 가족 단위 여행자도 가입 가능
  • 암호화폐 결제 가능

5. IMG Global – 가족, 고령자에게 유리한 전통형 보험

추천 대상: 가족 단위 여행자, 50대 이상 노마드, 장기 체류자

개요:
IMG는 커스터마이징 가능한 미국형 보험 플랜이 강점입니다.
고액 의료비 대비, 병원 네트워크 다양성에서 강력합니다.

장점:

  • 광범위한 병원 네트워크
  • 자기부담금/보장한도 조정 가능
  • 가족 및 고령자 전용 플랜 있음

단점:

  • 가입 절차가 다소 복잡
  • 일부 국가에서는 이용 불가

주요 특징:

  • 한 국가에 장기 체류하는 경우 유리
  • 기존 질병을 고려한 플랜 선택 가능
  • 거주비자 발급 시 활용 가능

나에게 맞는 여행자 보험을 고르는 핵심 질문

  • 원격근무 중인가요? 아니면 모험 여행을 하나요?
  • 노트북, 카메라 등 장비 보호가 필요한가요?
  • 한 국가에 오래 머무르나요? 여러 국가를 이동하나요?
  • 정신건강, 원격진료 기능이 필요한가요?
  • 비자 신청에 필요한 보험 증명서가 필요한가요?

빠른 비교 요약표

보험사가장 적합한 대상월 요금핵심 특징
SafetyWing예산형 노마드약 $45국가 이동 자유 + 간편 갱신
World Nomads모험/다국가 여행자약 $100 이상액티비티·장비 도난 보장
Genki유럽 중심 노마드€69투명한 요금, 거주지 불필요
Insured Nomads테크 중심 사용자약 $120정신건강·텔레메디슨 포함
IMG Global가족/고령자플랜별 다름미국형 의료 체계 + 커스터마이징 가능

청구를 원활하게 하는 실전 팁

  • 모든 영수증, 진단서, 현지 신고서 등은 사진 찍어 클라우드 저장
  • 앱을 통한 실시간 청구 기능 활용
  • 도난/사고 시 반드시 현지 경찰서에 신고
  • 장비 분실 시 호텔/항공사로부터 공식 문서 요청

마무리: 당신의 삶에 맞는 보험을 고르세요

단순한 “여행자 보험”이 아니라
당신의 생활 방식에 맞는 보험을 선택해야 합니다.

원격근무, 다국가 체류, 고가 장비를 갖춘 라이프스타일에는
전통적인 여행자 보험이 충분하지 않을 수 있습니다.

한 번의 응급 상황이 수백만 원의 차이를 만들 수 있습니다.
당신의 평온은 선택이 아니라, 전략입니다.


📌 다음 글 예고:
이번 여름 한 달 여행을 준비 중이신가요?
다음 글에서는 디지털 노마드를 위한 스마트 패킹리스트를 공개합니다.
가볍게, 빠짐없이, 똑똑하게 챙기는 방법을 알려드립니다.

How to Book Last-Minute Flights Without Overpaying

Airplane flying over a sunset-lit airport with empty boarding gates, symbolizing last-minute travel deals

Real-Time Strategies That Actually Work

The Last-Minute Flight Trap

You’re ready to take off—but the flights are 3x the price.
Sound familiar?

Last-minute flights have a reputation for being outrageously expensive—and for good reason.
Traditional advice tells you to book months in advance.
But what if you’re traveling spontaneously, responding to an emergency, or just didn’t plan ahead?

This guide will show you how to book last-minute flights without getting ripped off, using real-time tools, psychological pricing insights, and little-known hacks that even seasoned travelers miss.


1. Understand the Psychology of Airline Pricing

Airlines use dynamic pricing models that change fares dozens of times per day based on supply, demand, and search behavior.

Here’s how you can beat them:

  • Use Incognito Mode or VPN: If you keep checking a flight, the airline remembers. Prices may increase artificially.
  • Clear Your Cookies: Avoid search bias by removing your browsing history before comparing prices.
  • Switch Devices: Mobile searches may show different prices than desktops (yes, it still happens).

Timing also matters.
Some airlines release unsold inventory 24 to 72 hours before departure, often with steep discounts.


2. Use Real-Time Fare Trackers and Predictive Tools

Instead of manually checking 12 times a day, let algorithms do the work.

The best platforms for this are:

  • Google Flights: Set price alerts and view fare history. Their “Date Grid” is ideal for flexible trips.
  • Hopper: Predicts price changes using historical trends and alerts you when to buy.
  • Skyscanner: Includes low-cost carriers and lets you compare across entire months.
  • Kayak Explore: Shows last-minute deals from your home airport to anywhere cheap.

💡 Pro Tip: Combine these tools.
For example, find a cheap city with Kayak Explore → set Google Flights alert → book with airline app for best fare and customer service.


3. Be Flexible with Dates, Times, and Airports

If you’re willing to shift a little, you can save hundreds.

Flexibility Checklist:

  • Can you depart midweek (Tuesday/Wednesday)?
  • Are you open to flying red-eyes or early morning?
  • Can you use nearby airports (within 1–2 hours)?
  • Are you okay with one layover if it saves $200+?

Use Google Flights’ calendar view to see prices across 30 days.

Also, check regional airports. Sometimes, flying out of a smaller airport nearby offers a better deal—even after adding transport costs.


4. Check Hidden-City and Throwaway Ticketing

While controversial, hidden-city ticketing can cut costs dramatically.

Example:
You want to go to Chicago.
Instead of searching for “NYC → Chicago,” look for “NYC → Denver (via Chicago).”

Book the longer route, but get off at the layover.

Important cautions:

  • Only take carry-on luggage (your bags will go to the final destination)
  • Don’t do this repeatedly with the same airline
  • Never skip the first leg of any itinerary

Services like Skiplagged help find these hidden deals.

⚠️ Airlines dislike this practice. Use it responsibly and sparingly.


5. Set Price Alerts and Move Fast

Contrary to what you’d expect, some last-minute fares do drop—but briefly.

Here’s how to catch them:

  • Set alerts on Hopper, Google Flights, and Skyscanner
  • Turn on mobile notifications and check email twice a day
  • Book within 1–3 hours of seeing a drop—these prices usually disappear fast

Sometimes airlines “test” the market by dropping prices at random.
If you’re lucky and alert, you can grab seats before they’re gone.


6. Use Points, Miles, and Alternative Booking Platforms

When cash prices spike, your miles can shine.

  • Use airline points through their official app or site
  • Try OTAs (online travel agencies) like Expedia or Priceline for bundled discounts
  • Look into credit card travel portals (Chase, Amex, Capital One)

Also try:

  • Booking with foreign versions of airline websites (e.g., use Korean Air’s KR site)
  • Checking local OTAs if flying within a specific country or region

Sometimes different currencies = lower base prices.


7. Follow Deal Communities and Flash Sale Alerts

Communities like:

  • Secret Flying
  • The Flight Deal
  • Fly4Free
  • TravelPirates

…often post last-minute flash sales or “mistake fares” that aren’t even listed on Google.

Join their email lists or follow them on Twitter/X.
One alert can save you $300 or more—especially on international routes.


Bonus Strategy: Use a Throwaway Email to Simulate Demand

If you’re curious how airlines adjust pricing, try this experiment:

  • Search for a route frequently using your main account
  • Then search again with a throwaway Google account (new cookies, incognito browser)
  • Compare prices

You might be shocked by the difference.
This trick shows how powerful data tracking is in airfare pricing.


Final Thoughts: Speed, Strategy, and Self-Control

Booking a flight at the last minute doesn’t have to mean overpaying.
If you’re fast, strategic, and flexible, you can score fares that even advance planners envy.

Remember:

  • Don’t get emotionally attached to a specific airline or route
  • Always check 2–3 tools before buying
  • Consider alternative payment methods (miles, points, vouchers)

Travel smarter. Book faster. Keep your wallet intact.


📌 Next Up:
Wondering which travel insurance plans actually protect digital nomads on the move?
In our next post, we’ll compare the best summer travel insurance options for remote workers, expats, and long-term adventurers.

The Most Overrated vs Underrated Summer Destinations – Timeless Travel Wisdom for Smarter Trips

A peaceful beach town with minimal tourists, representing underrated summer destinations

What travel blogs won’t tell you—but your wallet will thank you for.

Why This Matters Every Summer

Every summer, millions of travelers flock to the same trendy destinations—only to be met with overpriced hotels, packed beaches, and Instagram-fueled disappointment.
Meanwhile, lesser-known places offer better value, authentic culture, and a more relaxed pace of life.

In this guide, we’ll compare 5 of the most overrated summer destinations with 5 underrated alternatives based on four key factors:
Cost
Crowd Levels
Digital Nomad Readiness
Cultural Depth


1. Santorini, Greece 🇬🇷

Overrated: Santorini

  • Hotels often exceed $400 per night during peak season
  • Crowds dominate the island’s narrow streets
  • Sunset spots are filled with selfie sticks and noise
  • Mass tourism has diluted local traditions

Try Instead: Paros or Naxos

  • Similar Cycladic views and crystal waters
  • Boutique beachfront stays for $120–$150 per night
  • Quiet fishing villages and family-run tavernas
  • Ferry ride from Athens takes just 3–4 hours

Monthly apartment rental: $800–$1,000
Coworking scene: Small but growing
Best for: Couples and creatives seeking peace


2. Bali, Indonesia 🇮🇩

Overrated: Bali (Ubud, Canggu)

  • Dense tourism with inconsistent infrastructure
  • Price inflation on food, lodging, and transport
  • Traffic congestion turns short trips into hours
  • Increasing visa enforcement makes long stays harder

Try Instead: Lombok or Flores

  • Breathtaking beaches and volcano views
  • Traditional villages with rich ceremonies
  • Diving, hiking, and nature without Instagram mobs

Monthly stay cost: ~$500–$700
Coworking: Basic, but fast Wi-Fi at guesthouses
Best for: Nature lovers, solo travelers


3. Barcelona, Spain 🇪🇸

Overrated: Barcelona

  • Tourist taxes, heavy police presence near Airbnbs
  • Overcrowded beaches and long lines at landmarks
  • High prices in peak season (June–August)

Try Instead: Valencia

  • Similar Mediterranean coast with fewer tourists
  • Flat, walkable city with historic charm
  • Famed for authentic Paella and Las Fallas festival

One-bedroom rental: ~$700–$900/month
Coworking hubs: Multiple modern spaces
Best for: Remote workers, food lovers


4. Tulum, Mexico 🇲🇽

Overrated: Tulum

  • Party-heavy scene, rising crime, inflated prices
  • Ecological degradation from overbuilding
  • Disconnect between tourism and local community

Try Instead: Mérida or Bacalar

  • Vibrant colonial city (Mérida) with low crime
  • Bacalar’s Lagoon of Seven Colors is a dream for swimmers
  • Cost of living is half that of Tulum

Monthly cost: ~$600–$850
Wi-Fi: Stable in most rentals, coworking optional
Best for: Cultural travelers, expats


5. Dubrovnik, Croatia 🇭🇷

Overrated: Dubrovnik

  • Massive cruise ship traffic overwhelms the Old Town
  • Game of Thrones fans flood every alley
  • Lodging is limited and expensive in summer

Try Instead: Šibenik or Zadar

  • Quieter Adriatic towns with real Croatian life
  • Beautiful harbors, fewer tourists, affordable cafes
  • Great base for island hopping or slow travel

Average apartment: ~$600/month
Nomad network: Emerging, with quiet cafés to work from
Best for: Budget-conscious travelers, digital nomads


How to Find Underrated Destinations on Your Own

Here’s how seasoned travelers identify hidden gems without relying on travel influencers:

Checklist:

  • Can you find monthly rentals under $900?
  • Is Wi-Fi speed over 30 Mbps?
  • Are there coworking spaces or active expat forums?
  • Can you eat out for under $10 a meal?
  • Are locals welcoming to long-stay foreigners?

Search tips:

  • Use Reddit or Facebook groups like “Digital Nomad XYZ”
  • Search “city name + coworking” instead of “top 10 travel”
  • Check visa policies—some countries offer 6–12 month stays for remote workers

Final Tip: Follow Function, Not Fame

In today’s world, the best travel isn’t about chasing Instagram views—it’s about longer, meaningful, and financially smart stays.

If a place offers clean food, stable internet, local connection, and peace of mind—it wins.
Travel deeper, not wider.


📌 Next Up:
Hunting for a last-minute flight deal without getting ripped off?
In our next post, we’ll break down live tools and strategies to catch the cheapest flights before prices spike.