Imagine sending $1,000 overseas and discovering your friend only got $950. That $50 “loss” isn’t magic—it’s hidden fees, poor exchange rates, and middle-bank charges. If you send money regularly—for rent, tuition, or to support family—those costs can total hundreds or even thousands of dollars a year. This guide shows you how to eliminate nearly all extra charges, keep 100% of your funds, and use advanced tactics to save even more.
1. Understand Where Your Money Goes
Flat Transaction Fees
Big banks often charge $25–$50 per transfer, regardless of amount.
Specialty services may advertise low fees but tack on additional charges later.
Exchange Rate Markups
Banks offer an “offered rate” that’s 1–3% worse than the true mid-market rate (the rate you see on Google or XE).
That margin is pure profit for them.
Correspondent Bank Fees
International transfers via SWIFT often pass through 2–3 intermediary banks, each adding $5–$15.
A chain of three can tack on $15–$45 extra.
Receiving Bank Fees
The recipient’s bank may deduct $5–$10 as a handling fee before crediting the final account.
Combined, these can reduce your friend’s payout to 85–90% of what you sent.
2. Switch to Fee-Transparent Platforms
Wise (formerly TransferWise) uses a peer-to-peer model:
Your USD goes into Wise’s U.S. account.
Wise pays out EUR from its European account.
No cross-border hops means no correspondent fees.
True Mid-Market Rates
Wise applies the exact rate you see online—zero markup.
Small, Upfront Fee
Around 0.4% of the transfer amount (varies by currency).
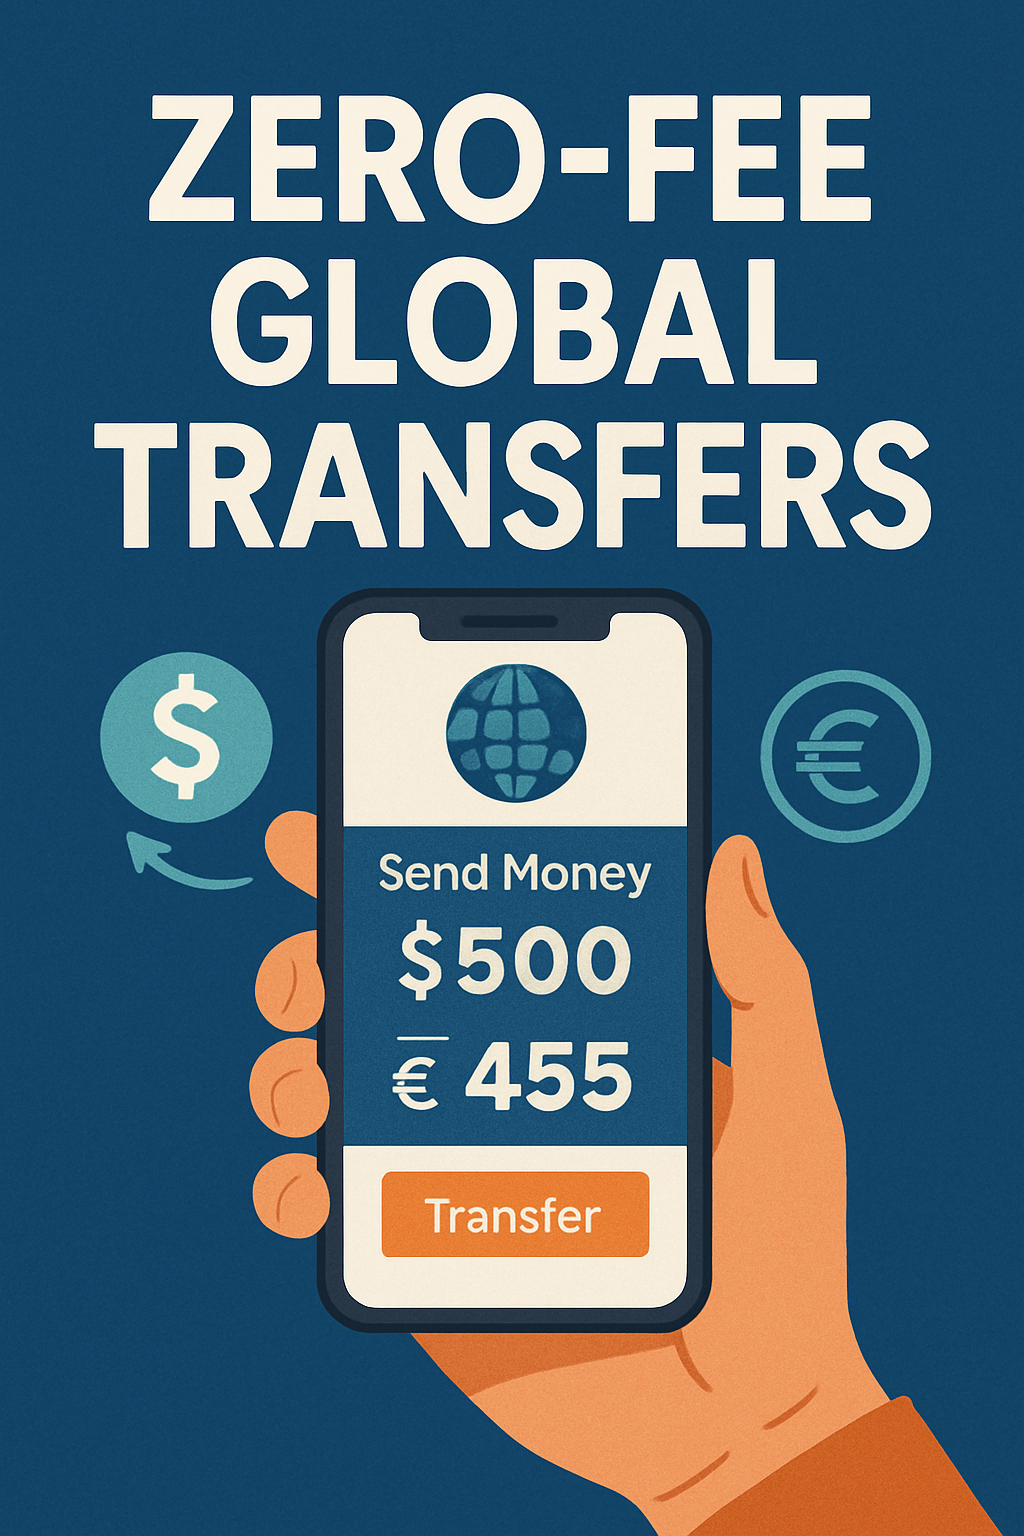
You see the breakdown—“Send $1,000 → Receive €900; Fee $4”—before you confirm.
Local Bank Accounts
Wise holds accounts in the U.S., U.K., EU, Australia, etc.
Transfers happen locally, bypassing expensive international routes.
Need quick tips? <a href=”/zero-fee-global-transfers-5-key-tips”>Zero-Fee Global Transfers: 5 Key Tips →</a>
3. Getting Started
Sign Up: Go to wise.com or download the Wise app. Enter your email and create a password.
Add Details: Fill in your name, birthdate, address, and reason for transfer.
Verify Identity: Upload your passport or driver’s license and take a quick selfie. Most verifications finish in 1–2 hours.
Once verified, you can send large amounts safely and legally.
4. Advanced Strategies for Extra Savings
1. Rate Alerts & Timing
Set a target rate (e.g., 1 USD = 0.92 EUR) in Wise or Revolut.
Receive instant alerts and execute transfers automatically.
A 0.5% improvement on $5,000 saves you $25 in a single transaction.
2. Batch Payments for Multiple Recipients
Prepare a CSV with up to 1,000 recipients.
Review and approve all payments in one click.
Pay one small percentage fee on the total rather than many fixed fees.
3. Multi-Currency Balances
Hold dozens of currencies in one account.
Top up when your chosen currency dips below your target rate, then convert later.
Smooth out rate fluctuations and maximize purchasing power.
Old way: AUD 1,000 → family gets INR 57,000 after AUD 15 + 2.5% margin
Wise: Fee AUD 4 + true rate → INR 60,000
Result: Family gains INR 3,000/month; INR 36,000/year
7. Your Action Plan
Set Rate Alerts: Choose a target exchange rate (e.g., 1 USD = 0.92 EUR) on platforms like Wise or Revolut. Receive instant notifications and lock in savings automatically.
Batch Payments: Upload up to 1,000 recipients in a spreadsheet and send all payments at once. Pay a single small percentage fee instead of multiple fixed fees.
Hold Multiple Currencies: Keep balances in key currencies (USD, EUR, GBP) and convert in small increments when rates hit your target.
Use a Fee-Transparent Card: Pay abroad with a Wise debit card and always decline dynamic currency conversion (DCC) to avoid hidden markups.
Automate with API: Integrate Wise with accounting software to schedule recurring transfers, reducing manual work and errors.
Ready to keep 100% of your money? <a href=”/mastering-zero-fee-global-transfers-complete-guide-keep-100-percent-of-your-money”>Complete Guide 다시 보기 →</a>
Sending money abroad shouldn’t cost you a fortune. Yet traditional banks and remittance services can quietly deduct 2–3% (or more) from every transfer through flat fees, poor exchange rates, and middle-bank charges. Over time, those hidden costs add up, eroding hundreds of dollars from your hard-earned funds.
Below is a concise guide—under 800 words—that distills the most effective strategies to cut your international transfer costs to nearly zero.
1. Set Up Rate Alerts and Strike at the Right Moment
Exchange rates fluctuate constantly. Capturing even a 0.5% improvement on a single large transfer can save you tens of dollars.
Choose your target rate. On platforms like Wise or Revolut, set a custom alert for the exchange rate you need (e.g., 1 USD = 0.92 EUR).
Receive instant notifications. As soon as the market hits your rate, you’ll get an email or push notification.
Execute immediately. Avoid manual checking: let the alert trigger your transfer so you lock in savings without delay.
Why it matters: A 0.5% gain on $5,000 is $25 saved in one transaction—compounded over time, that’s significant.
2. Use Batch Payments for Multiple Recipients
If you send to several people each month—freelancers, family members, or contractors—batch payments eliminate repeated fixed fees and manual work.
Upload a spreadsheet. Prepare a CSV listing each recipient’s name, account details, and amount.
One-click approval. Review the batch in your dashboard, then confirm all payments simultaneously.
Avoid per-transfer flat fees. Rather than $5 per person, you pay a single, small percentage fee on the total.
Why it matters: Sending 10 separate $200 transfers at $5 each costs $50 in flat fees. Batch payments may reduce that to a single $3–$5 fee, saving over 90%.
3. Hold and Convert in Multiple Currencies
Rather than converting a large lump sum all at once, maintain balances in key currencies and exchange when rates are favorable.
Open a multi-currency account. Services like Wise let you hold dozens of currencies under one login.
Watch your “buy” thresholds. Decide the rate at which you’re comfortable converting (e.g., 1 USD = 0.89 EUR).
Execute in pieces. Top up your EUR balance in smaller increments whenever the market dips below your threshold.
Why it matters: If you convert $10,000 in two tranches—$5,000 at 1 USD = 0.90 EUR and $5,000 at 1 USD = 0.92 EUR—you average 1 USD = 0.91 EUR, saving more than converting the full amount at a single, lower rate.
4. Spend Abroad at True Mid-Market Rates
When traveling or making online purchases in foreign currency, avoid dynamic currency conversion (DCC) and merchant markups.
Use a fee-transparent debit card. A Wise or Revolut card charges you exactly the mid-market rate shown on Google or XE.
Decline DCC at checkout. If a retailer prompts you to pay in your home currency, always choose to pay in the local currency.
Link to mobile wallets. Add your card to Apple Pay or Google Pay to prevent merchants from slipping in hidden fees.
Why it matters: A 1% markup on a €1,000 hotel bill is €10 lost. Over multiple purchases, these charges quickly eclipse any annual foreign-transaction fee.
5. Automate Transfers via API for Recurring Payments
For businesses, freelancers, or anyone with regular payouts, API integration streamlines the process and slashes manual errors.
Connect your accounting software. Platforms like Xero, QuickBooks, or Zoho Books often support direct Wise integration.
Trigger on invoices or schedules. Automate payroll, vendor bills, or subscription refunds at set dates.
Maintain an auditable trail. Each transaction is logged with metadata, simplifying reporting and compliance.
Why it matters: Automating a $50,000 monthly payroll at 0.4% fee costs $200. Manual wires at 1.5% (plus $30 flat) would cost $780—almost four times as much.
Putting It All Together
Audit your past transfers. Calculate total fees paid over the last 6–12 months.
Sign up and verify. Create accounts on Wise (or similar), complete KYC, and fund your multi-currency balances.
Configure alerts. Set up your desired exchange-rate targets and notification channels.
Schedule batch or recurring transfers. Migrate bulk payouts and regular payments to batch or API methods.
Use your card wisely. Pay abroad at true rates, always refusing DCC.
By combining these five tactics—rate alerts, batch payments, multi-currency holding, transparent card spending, and API automation—you can drive your per-transfer fee below 0.3% and, in many cases, effectively to zero.
국제 송금은 불필요한 비용 없이 진행되어야 합니다. 그러나 전통 은행이나 송금 서비스는 고정 수수료, 불리한 환율, 중계 은행 수수료 등으로 매번 2~3% 이상의 금액을 은밀히 차감합니다. 장기적으로 보면 수백 달러가 귀하의 주머니를 빠져나가죠.
아래 800단어 미만의 간결한 가이드는 국제 송금 비용을 거의 0에 가깝게 줄이는 가장 효과적인 전략을 모았습니다.
1. 환율 알림 설정으로 최적 시점 포착하기
환율은 분 단위로 변동합니다. 단 한 번의 대규모 송금에서 0.5%만 환율이 유리하게 움직여도 수십 달러를 절약할 수 있습니다.
목표 환율 지정: Wise, Revolut 같은 플랫폼에서 원하는 환율(예: 1 USD = 0.92 EUR)을 설정합니다.
즉시 알림 수신: 시장이 목표 환율에 도달하면 이메일 또는 푸시 알림을 받습니다.
자동 실행 또는 즉송: 수동 확인 없이 알림이 송금을 트리거하도록 설정해 즉시 송금합니다.
이렇게 해야 하는 이유: 5,000달러를 송금할 때 0.5%만 이익이 나도 한 번에 25달러를 절약할 수 있습니다.
2. 일괄 송금 기능 활용하기
매달 여러 명(프리랜서·가족·계약자 등)에게 송금해야 한다면, 일괄 송금 기능으로 반복되는 고정 수수료와 수작업을 줄일 수 있습니다.
스프레드시트 업로드: 수신자 이름, 계좌 정보, 송금액을 담은 CSV 파일을 준비합니다.
한 번에 승인: 대시보드에서 전체 목록을 검토한 뒤 한 번에 승인합니다.
고정 수수료 회피: 개별 송금 건당 5달러 대신, 전체 금액에 대한 소액 비율 수수료만 지불합니다.
이렇게 해야 하는 이유: 200달러씩 10건을 보낼 때 건당 5달러면 총 50달러지만, 일괄 송금 수수료는 3~5달러 수준으로 90% 이상 절감됩니다.
3. 다중 통화 잔액 유지 및 분할 환전
한 번에 큰 금액을 일괄 환전하지 말고, 주요 통화별 잔액을 유지하면서 유리할 때 나눠서 환전하세요.
다중 통화 계좌 개설: Wise 등에서 하나의 계정으로 수십 개 통화를 보유할 수 있습니다.
“구매” 기준 환율 지정: 예를 들어 1 USD = 0.89 EUR 이하일 때만 환전하도록 목표를 설정합니다.
분할 환전 실행: 시장 환율이 목표 이하로 하락할 때마다 소액씩 충전합니다.
이렇게 해야 하는 이유: 1만 달러를 한 번에 1 USD = 0.90 EUR로 환전하면 9,000 EUR지만, 5,000달러씩 1 USD = 0.90 및 1 USD = 0.92로 나눠 환전하면 평균 1 USD = 0.91 EUR로 9,100 EUR를 확보할 수 있습니다.
4. 진짜 시장 환율로 해외 결제하기
여행 중이거나 해외 온라인 쇼핑할 때 동적 통화 변환(DCC)과 판매자 마크업을 피하세요.
투명 수수료 직불카드 사용: Wise 카드나 Revolut 카드는 Google·XE에 표시된 중간 환율 그대로 과금합니다.
결제 시 DCC 거부: 가맹점에서 자국 통화 결제를 제안하면 항상 현지 통화로 결제합니다.
모바일 지갑 연동: Apple Pay·Google Pay에 카드를 등록해 숨은 수수료 삽입을 막습니다.
이렇게 해야 하는 이유: 1,000 EUR 호텔 결제에 1% 마크업을 적용하면 10 EUR 손실입니다. 이런 비용은 소액 결제가 쌓일수록 연간 외환 수수료보다 더 커집니다.
5. API 통합으로 정기 송금 자동화하기
정기 급여나 프리랜서 대금 등 반복 송금이 있다면 API 연동으로 수작업을 없애고 오류를 최소화할 수 있습니다.
회계 시스템 연동: Xero, QuickBooks, Zoho Books 등 주요 회계 소프트웨어와 직접 연결합니다.
청구서·일정 기반 자동 실행: 송장 발행이나 정기 지불 일정에 따라 자동으로 송금이 이루어지도록 설정합니다.
감사 추적 로그 확보: 모든 거래에 메타데이터가 기록되어 보고·컴플라이언스가 간편해집니다.
이렇게 해야 하는 이유: 월 5만 달러 급여를 0.4% 수수료로 자동 송금하면 200달러 비용이지만, 1.5% + 30달러 고정 수수료로 수동 이체 시 780달러가 듭니다. 비용 차이가 거의 4배에 이릅니다.
종합 실행 계획
지난 송금 내역 감��: 지난 6~12개월 동안 지불한 총 수수료를 계산합니다.
계정 가입 및 인증: Wise(또는 유사 서비스)에 가입하고 신원 확인을 완료합니다.
환율 알림 설정: 원하는 환율 목표와 알림 채널을 구성합니다.
일괄 및 정기 송금 예약: 대량 지급과 반복 송금을 일괄 또는 API 방식으로 전환합니다.
투명 카드 사용: 해외 결제 시 항상 중간 환율을 적용받도록 카드 결제를 관리합니다.
이 다섯 가지 전략을 결합하면 송금당 비용을 0.3% 이하, 사실상 무료 수준으로 낮출 수 있습니다. 오늘 바로 시작해 **내 돈 100%**를 지키며 국제 송금 비용을 획기적으로 절약하세요!
Introduction: Why Sending Money Abroad Can Cost You
How Traditional Banks and Services Add Hidden Fees
Meet Wise: A Simple Way to Cut Costs
Opening and Verifying Your Wise Account
Step-by-Step: Sending Your First Wise Transfer
Smart Tips for Bigger Transfers and Multiple Currencies
Comparing Wise with Other Services
Real-Life Stories: How People Saved Money with Wise
Frequently Asked Questions (FAQ)
Summary and Next Steps
Table of Contents
Introduction: Why Sending Money Abroad Can Cost You
How Traditional Banks and Services Add Hidden Fees
Meet Wise: A Simple Way to Cut Costs
Opening and Verifying Your Wise Account
Step-by-Step: Sending Your First Wise Transfer
Smart Tips for Bigger Transfers and Multiple Currencies
Comparing Wise with Other Services
Real-Life Stories: How People Saved Money with Wise
Frequently Asked Questions (FAQ)
Summary and Next Steps
1. Introduction: Why Sending Money Abroad Can Cost You
Imagine you need to send $100 to a friend studying overseas. You log into your bank’s online system or visit a branch, enter the details, and press send. A few days later, your friend checks their account only to find $95. Where did the extra $5 go?
Every time you send money across borders, you might pay more than you realize:
Flat fees: A set charge, for example $5 or $10 each time you send money.
Exchange rate markups: Banks often give you a worse rate than the true market rate, keeping the difference.
Middleman fees: Large transfers often pass through one or more banks before reaching the final destination, each taking a cut.
These hidden costs add up. If you send money regularly—for rent, tuition, or to support family—losing even 2–3% per transfer can mean hundreds of dollars wasted each year. In this guide, we’ll show you how modern services like Wise let you keep nearly 100% of what you send, all in easy steps anyone can follow.
2. How Traditional Banks and Services Add Hidden Fees
To understand why Wise saves you money, first let’s break down how banks and old-style money-transfer companies charge you.
2.1 Flat Transaction Fees
Most banks charge a flat fee every time you initiate an international transfer. Common examples:
Large banks may charge $25–$50 per transfer.
Regional banks might charge $10–$20.
Specialty money-transfer shops (like Western Union) often charge $5–$15 but add other fees too.
This fee applies whether you send $100 or $10,000. If you send small amounts often, the fixed fee can swallow a large percentage of your payment.
2.2 Exchange Rate Markups
When you send one currency (say USD) and your friend gets another (say Euros), the bank uses an exchange rate. But it is rarely the true mid-market rate.
Mid-market rate: The real rate banks use to trade with each other (what you see on Google or XE).
Offered rate: The rate your bank gives you, usually 1–3% worse. That 1–3% difference goes straight into the bank’s pocket.
For example:
True rate: $1.00 = €0.90
Bank’s rate: $1.00 = €0.87 If you send $1,000, you get €870 instead of €900, a €30 loss before any other fees.
2.3 Correspondent (Middle) Bank Fees
Large transfers often move through the SWIFT network. Your bank sends money to a “correspondent” bank, which then passes it on, and finally to the recipient’s bank. Each link can charge a fee, typically $5–$15.
If three banks are involved, that’s $15–$45 in extra charges, on top of flat fees and markup.
2.4 Hidden Recipient Fees
Even after your money arrives, the recipient’s bank may deduct a handling fee before crediting the account. The recipient might lose another $5–$10 unexpectedly.
3. Meet Wise: A Simple Way to Cut Costs
Wise (formerly TransferWise) was built to solve these problems. Here’s how it works in plain terms:
3.1 Peer-to-Peer Matching
You want to send USD to Europe; someone else wants to send EUR to the U.S.
Instead of moving money across borders, Wise matches you:
Your USD goes into Wise’s U.S. account.
Wise pays your friend from its European account in EUR.
No need to move money across the ocean—no middle-bank fees.
3.2 True Mid-Market Exchange Rate
Wise uses the exact rate you see online (Google/XE).
You know you’re not getting a bad deal on currency conversion.
3.3 A Small, Transparent Fee
Wise charges a clear fee of around 0.4% of the amount sent (varies by currency pair).
You see the fee breakdown before you confirm. No surprises.
3.4 Local Bank Accounts
Wise has bank accounts in many countries (U.S., U.K., EU).
Sending money means moving funds locally, so you bypass expensive international routes.
4. Opening and Verifying Your Wise Account
Anybody can sign up for Wise in minutes. No special knowledge is needed.
4.1 Sign Up
Go to wise.com or download the Wise app (iOS/Android).
Enter your email and create a password.
Confirm your email address.
4.2 Add Basic Details
Full name, date of birth, address.
Reason for transfer (personal payment, gift, business).
All in simple fill-in-the-blank forms.
4.3 Identity Verification
To comply with laws, Wise asks you to prove who you are:
Upload a photo of your ID (passport or driver’s license).
Take a quick selfie.
Wise reviews and verifies within 1–2 hours.
Once verified, you can send up to very large amounts safely.
This article is written in clear, straightforward language so that anyone—from a high school student to a busy professional—can understand and act on it right away.
목차
서론: 해외 송금이 비용이 많이 드는 이유
전통 은행과 서비스가 숨기는 수수료
Wise 소개: 비용을 크게 줄이는 간단한 방법
Wise 계정 개설 및 인증
단계별 가이드: 첫 Wise 송금하기
대량 송금과 다중 통화 활용 팁
Wise와 다른 서비스 비교
실제 사례: Wise로 절약한 사람들 이야기
자주 묻는 질문(FAQ)
요약 및 다음 단계
1. 서론: 해외 송금이 비용이 많이 드는 이유
100달러를 해외에 보내야 하는 상황을 상상해 보세요. 은행 인터넷뱅킹이나 지점을 방문해 송금을 요청하면, 며칠 뒤 친구 계좌에 입금된 금액은 95달러입니다. 나머지 5달러는 어디로 간 걸까요?
국경을 넘는 송금에는 보통 다음과 같은 비용이 숨어 있습니다:
고정 수수료: 송금할 때마다 부과되는 5~10달러 정도의 수수료
환율 마진: 은행이 알려주는 환율은 실제 시장 환율보다 1~3% 불리하게 책정
중계 은행 수수료: 여러 은행(중계 은행)을 거치며 각 은행이 추가 공제
이 모든 비용이 합쳐지면 한 번에 2~3% 이상, 자주 송금할수록 매년 수백 달러가 손실될 수 있습니다. 이 글에서는 Wise 같은 현대 핀테크 서비스를 통해 어떻게 거의 100% 금액을 그대로 보낼 수 있는지, 누구나 따라 할 수 있는 단계별 방법을 알려드립니다.
2. 전통 은행과 서비스가 숨기는 수수료
Wise로 비용을 절감하려면, 먼저 기존 방식의 비용 구조를 이해해야 합니다.
2.1 고정 송금 수수료
대형 은행: 송금당 25–50달러 수수료
지역 은행: 10–20달러 수수료
국제 송금 전문 업체: 5–15달러 수수료(다른 숨은 비용 포함)
송금 금액이 얼마든 수수료는 고정이므로, 작은 금액을 자주 보낼수록 비율상 큰 손해가 발생합니다.
2.2 환율 마진
송금할 때 은행은 중간 시장 환율(실제 은행 간 거래 환율) 대신 더 불리한 환율을 제공합니다.
중간 시장 환율: 구글이나 XE에서 확인 가능한 실제 환율
제공 환율: 은행이 1~3%가량 마진을 붙여서 제공
예를 들어:
진짜 환율: 1달러 = 0.90유로
은행 환율: 1달러 = 0.87유로 1,000달러를 보내면 은행이 870유로를 주지만, 중간 환율 기준으로는 900유로를 받아야 합니다. 30유로가 은행 주머니로 들어가는 셈입니다.
2.3 중계 은행 수수료
국제 송금은 SWIFT 네트워크를 통해 중계 은행을 거칩니다. 각 은행마다 5–15달러의 추가 수수료가 붙습니다. 은행 A→중계 은행→은행 B 순으로 세 번 거치면 15–45달러가 더 빠져나갑니다.
2.4 수취 은행 수수료
마지막으로 받는 은행이 송금액에서 5–10달러를 추가로 공제하는 경우도 있어, 보내는 사람과 받는 사람 모두 손해를 볼 수 있습니다.
3. Wise 소개: 비용을 크게 줄이는 간단한 방법
Wise(구 TransferWise)는 위와 같은 불필요한 비용을 제거하도록 고안된 서비스입니다.
전통 방식: 은행 수수료 AUD 15 + 2.5% 마진 → 가족 수령 INR 약 57,000
Wise 방식: 수수료 AUD 4 + 중간 환율 적용 → 가족 수령 INR 약 60,000
결과: 가족이 매달 INR 3,000 더 수령, 연간 INR 36,000 추가 혜택
9. 자주 묻는 질문(FAQ)
Wise는 안전한가요?
예. 영국 FCA, 미국 FinCEN 등 금융당국에 등록·허가된 서비스입니다.
고객 자금은 별도 분리 보관되어 보호됩니다.
수취인 은행이 지원되지 않으면 어떻게 하나요?
Wise는 50개 이상의 통화와 대부분 국가를 지원합니다.
미지원 지역은 최적 대체 방법을 안내해 줍니다.
송금 취소가 가능한가요?
Wise가 처리하기 전이라면 대시보드에서 “Cancel” 버튼으로 취소할 수 있습니다.
숨은 수수료는 없나요?
전혀 없습니다. 수수료는 송금 전 모두 표시되며, 그 이상 추가 요금은 없습니다.
송금 소요 시간은 얼마나 걸리나요?
대부분 24시간 이내에 완료됩니다. 즉시 처리되거나 최대 2영업일 걸릴 수 있습니다.
10. 요약 및 다음 단계
이제 더 이상 해외 송금할 때 돈을 잃을 필요가 없습니다. Wise를 사용하면:
진짜 중간 시장 환율 적용 (구글과 동일한 환율)
낮고 투명한 수수료 (~0.4%)
빠른 전송 속도 (대부분 1일 이내)
편리한 다중 통화 계좌 제공
당장 실행해 보세요:
Wise 계정을 가입 및 인증합니다.
소액 테스트 송금으로 절차를 확인합니다.
배치 송금이나 다중 통화 기능으로 대량·빈번한 송금을 최적화합니다.
예전 비용과 비교해 얼마나 절약했는지 기록해 둡니다.
Table of Contents
Introduction: Why Sending Money Abroad Can Cost You
How Traditional Banks and Services Add Hidden Fees
Meet Wise: A Simple Way to Cut Costs
Opening and Verifying Your Wise Account
Step-by-Step: Sending Your First Wise Transfer
Smart Tips for Bigger Transfers and Multiple Currencies
Comparing Wise with Other Services
Real-Life Stories: How People Saved Money with Wise
Frequently Asked Questions (FAQ)
Summary and Next Steps
1. Introduction: Why Sending Money Abroad Can Cost You
Imagine you need to send $100 to a friend studying overseas. You log into your bank’s online system or visit a branch, enter the details, and press send. A few days later, your friend checks their account only to find $95. Where did the extra $5 go?
Every time you send money across borders, you might pay more than you realize:
Flat fees: A set charge, for example $5 or $10 each time you send money.
Exchange rate markups: Banks often give you a worse rate than the true market rate, keeping the difference.
Middleman fees: Large transfers often pass through one or more banks before reaching the final destination, each taking a cut.
These hidden costs add up. If you send money regularly—for rent, tuition, or to support family—losing even 2–3% per transfer can mean hundreds of dollars wasted each year. In this guide, we’ll show you how modern services like Wise let you keep nearly 100% of what you send, all in easy steps anyone can follow.
2. How Traditional Banks and Services Add Hidden Fees
To understand why Wise saves you money, first let’s break down how banks and old-style money-transfer companies charge you.
2.1 Flat Transaction Fees
Most banks charge a flat fee every time you initiate an international transfer. Common examples:
Large banks may charge $25–$50 per transfer.
Regional banks might charge $10–$20.
Specialty money-transfer shops (like Western Union) often charge $5–$15 but add other fees too.
This fee applies whether you send $100 or $10,000. If you send small amounts often, the fixed fee can swallow a large percentage of your payment.
2.2 Exchange Rate Markups
When you send one currency (say USD) and your friend gets another (say Euros), the bank uses an exchange rate. But it is rarely the true mid-market rate.
Mid-market rate: The real rate banks use to trade with each other (what you see on Google or XE).
Offered rate: The rate your bank gives you, usually 1–3% worse. That 1–3% difference goes straight into the bank’s pocket.
For example:
True rate: $1.00 = €0.90
Bank’s rate: $1.00 = €0.87 If you send $1,000, you get €870 instead of €900, a €30 loss before any other fees.
2.3 Correspondent (Middle) Bank Fees
Large transfers often move through the SWIFT network. Your bank sends money to a “correspondent” bank, which then passes it on, and finally to the recipient’s bank. Each link can charge a fee, typically $5–$15.
If three banks are involved, that’s $15–$45 in extra charges, on top of flat fees and markup.
2.4 Hidden Recipient Fees
Even after your money arrives, the recipient’s bank may deduct a handling fee before crediting the account. The recipient might lose another $5–$10 unexpectedly.
3. Meet Wise: A Simple Way to Cut Costs
Wise (formerly TransferWise) was built to solve these problems. Here’s how it works in plain terms:
3.1 Peer-to-Peer Matching
You want to send USD to Europe; someone else wants to send EUR to the U.S.
Instead of moving money across borders, Wise matches you:
Your USD goes into Wise’s U.S. account.
Wise pays your friend from its European account in EUR.
No need to move money across the ocean—no middle-bank fees.
3.2 True Mid-Market Exchange Rate
Wise uses the exact rate you see online (Google/XE).
You know you’re not getting a bad deal on currency conversion.
3.3 A Small, Transparent Fee
Wise charges a clear fee of around 0.4% of the amount sent (varies by currency pair).
You see the fee breakdown before you confirm. No surprises.
3.4 Local Bank Accounts
Wise has bank accounts in many countries (U.S., U.K., EU).
Sending money means moving funds locally, so you bypass expensive international routes.
4. Opening and Verifying Your Wise Account
Anybody can sign up for Wise in minutes. No special knowledge is needed.
4.1 Sign Up
Go to wise.com or download the Wise app (iOS/Android).
Enter your email and create a password.
Confirm your email address.
4.2 Add Basic Details
Full name, date of birth, address.
Reason for transfer (personal payment, gift, business).
All in simple fill-in-the-blank forms.
4.3 Identity Verification
To comply with laws, Wise asks you to prove who you are:
Upload a photo of your ID (passport or driver’s license).
Take a quick selfie.
Wise reviews and verifies within 1–2 hours.
Once verified, you can send up to very large amounts safely.
Result: Family gains INR 3,000 more per month, INR 36,000 per year.
9. Frequently Asked Questions (FAQ)
Is Wise safe?
Yes. Wise is regulated by financial authorities (FCA in the U.K., FinCEN in the U.S.).
Customer funds are held in separate accounts for protection.
What if my recipient’s bank isn’t supported?
Wise supports 50+ currencies and many countries. For unsupported ones, Wise suggests the best alternatives.
Can I cancel a transfer after I confirm?
You can cancel before Wise processes it fully. Check your dashboard and click “Cancel” if available.
Are there any hidden fees?
No. Wise always shows fees upfront. What you see is what you pay.
How long do transfers take?
Most transfers arrive within 24 hours. Some can happen instantly or take up to 2 business days.
10. Summary and Next Steps
You no longer have to accept losing money every time you send funds abroad. With Wise, you benefit from:
True mid-market rates (same as Google rates)
Low, transparent fees (~0.4%)
Fast delivery (often within a day)
Convenient multi-currency accounts
Next Steps for You:
Sign up for Wise and verify your identity.
Try a small test transfer to see how it works.
Use batch payments or hold multiple currencies if you send large or frequent transfers.
Track your savings and compare old costs vs. new costs.
Start your first zero-fee global transfer today and keep 100% of your money in your pocket.
This article is written in clear, straightforward language so that anyone—from a high school student to a busy professional—can understand and act on it right away.
목차
서론: 해외 송금이 비용이 많이 드는 이유
전통 은행과 서비스가 숨기는 수수료
Wise 소개: 비용을 크게 줄이는 간단한 방법
Wise 계정 개설 및 인증
단계별 가이드: 첫 Wise 송금하기
대량 송금과 다중 통화 활용 팁
Wise와 다른 서비스 비교
실제 사례: Wise로 절약한 사람들 이야기
자주 묻는 질문(FAQ)
요약 및 다음 단계
1. 서론: 해외 송금이 비용이 많이 드는 이유
100달러를 해외에 보내야 하는 상황을 상상해 보세요. 은행 인터넷뱅킹이나 지점을 방문해 송금을 요청하면, 며칠 뒤 친구 계좌에 입금된 금액은 95달러입니다. 나머지 5달러는 어디로 간 걸까요?
국경을 넘는 송금에는 보통 다음과 같은 비용이 숨어 있습니다:
고정 수수료: 송금할 때마다 부과되는 5~10달러 정도의 수수료
환율 마진: 은행이 알려주는 환율은 실제 시장 환율보다 1~3% 불리하게 책정
중계 은행 수수료: 여러 은행(중계 은행)을 거치며 각 은행이 추가 공제
이 모든 비용이 합쳐지면 한 번에 2~3% 이상, 자주 송금할수록 매년 수백 달러가 손실될 수 있습니다. 이 글에서는 Wise 같은 현대 핀테크 서비스를 통해 어떻게 거의 100% 금액을 그대로 보낼 수 있는지, 누구나 따라 할 수 있는 단계별 방법을 알려드립니다.
2. 전통 은행과 서비스가 숨기는 수수료
Wise로 비용을 절감하려면, 먼저 기존 방식의 비용 구조를 이해해야 합니다.
2.1 고정 송금 수수료
대형 은행: 송금당 25–50달러 수수료
지역 은행: 10–20달러 수수료
국제 송금 전문 업체: 5–15달러 수수료(다른 숨은 비용 포함)
송금 금액이 얼마든 수수료는 고정이므로, 작은 금액을 자주 보낼수록 비율상 큰 손해가 발생합니다.
2.2 환율 마진
송금할 때 은행은 중간 시장 환율(실제 은행 간 거래 환율) 대신 더 불리한 환율을 제공합니다.
중간 시장 환율: 구글이나 XE에서 확인 가능한 실제 환율
제공 환율: 은행이 1~3%가량 마진을 붙여서 제공
예를 들어:
진짜 환율: 1달러 = 0.90유로
은행 환율: 1달러 = 0.87유로 1,000달러를 보내면 은행이 870유로를 주지만, 중간 환율 기준으로는 900유로를 받아야 합니다. 30유로가 은행 주머니로 들어가는 셈입니다.
2.3 중계 은행 수수료
국제 송금은 SWIFT 네트워크를 통해 중계 은행을 거칩니다. 각 은행마다 5–15달러의 추가 수수료가 붙습니다. 은행 A→중계 은행→은행 B 순으로 세 번 거치면 15–45달러가 더 빠져나갑니다.
2.4 수취 은행 수수료
마지막으로 받는 은행이 송금액에서 5–10달러를 추가로 공제하는 경우도 있어, 보내는 사람과 받는 사람 모두 손해를 볼 수 있습니다.
3. Wise 소개: 비용을 크게 줄이는 간단한 방법
Wise(구 TransferWise)는 위와 같은 불필요한 비용을 제거하도록 고안된 서비스입니다.